| Voir le sujet précédent :: Voir le sujet suivant |
| Auteur |
Message |
LV
Maniaco Posteur

Inscrit le: 12 Déc 2011

Localisation: Trencin
Âge: 58

|
 Posté le: 23/12/2011 18:57 Sujet du message: Posté le: 23/12/2011 18:57 Sujet du message: |
  |
|
|
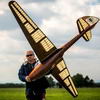
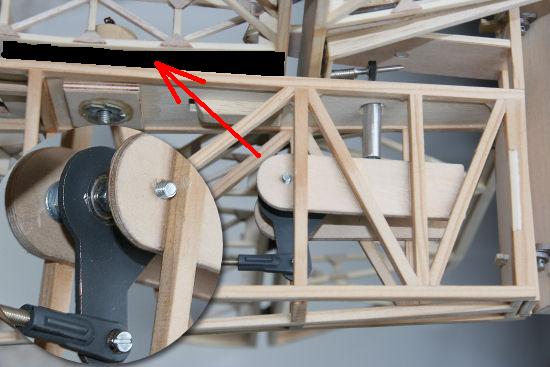
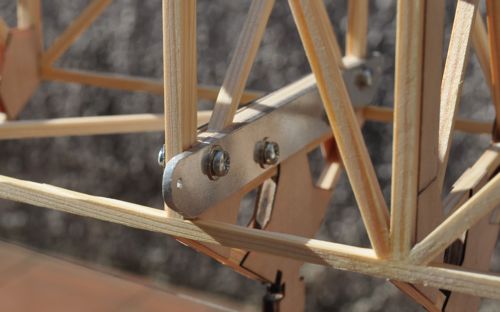
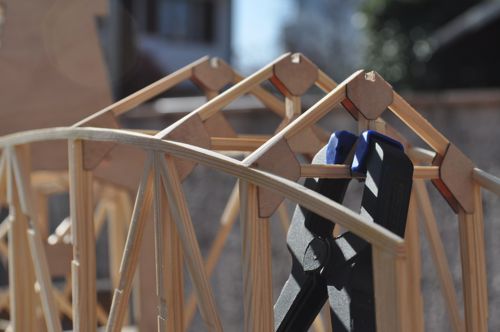
Dieses Detail ....

Auf diesem Bild ist die Linie gerade. Kein Profil. Und Höhenruder ist profiliert.... |
|
| Revenir en haut de page |
|
 |
LV
Maniaco Posteur
Inscrit le: 12 Déc 2011
Localisation: Trencin
Âge: 58
|
| Posté le: 23/12/2011 19:00 Sujet du message: |
|
|
|
| Die Frage ist, was hält Höhenruder in der richtige Position ??? |
|
| Revenir en haut de page |
|
|
VincentB
Serial Posteur


Inscrit le: 23 Jan 2006

Localisation: A la playa, bajo el sol
Âge: 60

|
| Posté le: 23/12/2011 19:06 Sujet du message: |
|
|
|
with that?
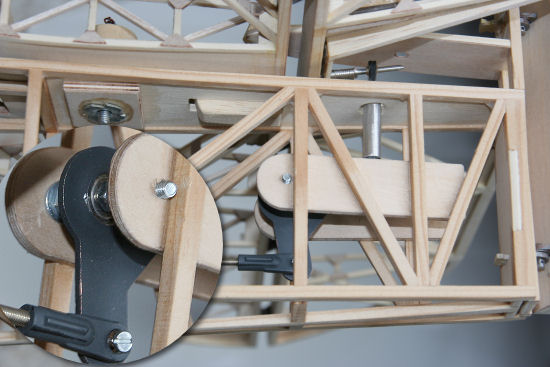
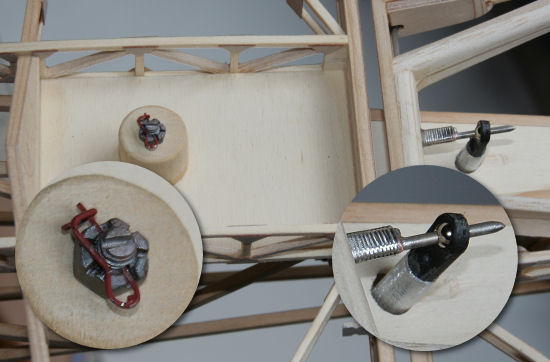
Il n'y a rien qui retient le volet, mais il ne bouge pas s'il n'y a pas de jeu dans l'ouverture de la base en contre-plaqué de la commande en tube alu
ppfff very difficult for me to explain technic detail in other language 

Retroplane et modélisme en pause, vanlife à haute dose. |
|
| Revenir en haut de page |
|
|
LV
Maniaco Posteur
Inscrit le: 12 Déc 2011
Localisation: Trencin
Âge: 58
|
| Posté le: 23/12/2011 19:41 Sujet du message: |
|
|
|
![[humm]](images/smiles/humm.gif)
Ich denke nicht nur Ruder-bewegliche Teil, aber (Englisch) Elevator gesamt.
Was hält Elevator in richtige höhe ...
Anstellwinkel??? ist es das richtige wort?  |
|
| Revenir en haut de page |
|
|
VincentB
Serial Posteur
Inscrit le: 23 Jan 2006
Localisation: A la playa, bajo el sol
Âge: 60
|
| Posté le: 23/12/2011 19:45 Sujet du message: |
|
|
|
ça appuie à plat au niveau de la vis et ça ne bouge pas, latéralement il y a le petit tasseau de bois qui s'encastre dans la platine
Retroplane et modélisme en pause, vanlife à haute dose. |
|
| Revenir en haut de page |
|
|
Frank Albrecht
Incurable Posteur


Inscrit le: 09 Juil 2007

Localisation: Burladingen-Stetten, Allemagne
Âge: 58

|
| Posté le: 23/12/2011 20:06 Sujet du message: |
|
|
|
Hallo LV,
Vincent schreibt, dass die Schraube die Höhenflosse auf die ebene Auflage drückt. Seitlich gibt es eine Führung durch die Leiste, die in den Schlitz in der Auflage greift.
Sicher wäre es besser, eine profilförmige Auflage für die Höhenflosse anzubringen, oder zumindest zwei Leisten, auf denen die Flosse aufliegen kann.
Frank |
|
| Revenir en haut de page |
|
|
LV
Maniaco Posteur
Inscrit le: 12 Déc 2011
Localisation: Trencin
Âge: 58
|
|
| Revenir en haut de page |
|
|
LV
Maniaco Posteur
Inscrit le: 12 Déc 2011
Localisation: Trencin
Âge: 58
|
| Posté le: 24/12/2011 21:08 Sujet du message: |
|
|
|
Es ist Weihnachten... und ich beendete die Rippen ![[argh]](images/smiles/argh.gif)
|
|
| Revenir en haut de page |
|
|
Anonyme
Serial Posteur

Inscrit le: 26 Jan 2006

|
| Posté le: 25/12/2011 10:58 Sujet du message: |
|
|
|
Nice winter work ! ![[clap]](images/smiles/Clap.gif) |
|
| Revenir en haut de page |
|
|
VincentB
Serial Posteur
Inscrit le: 23 Jan 2006
Localisation: A la playa, bajo el sol
Âge: 60
|
|
| Revenir en haut de page |
|
|
Brevino
Stagiaire Posteur


Inscrit le: 10 Mar 2012

Localisation: Pisa
Âge: 52
|
| Posté le: 25/03/2012 00:19 Sujet du message: A new member and a new MG12a... |
|
|
|
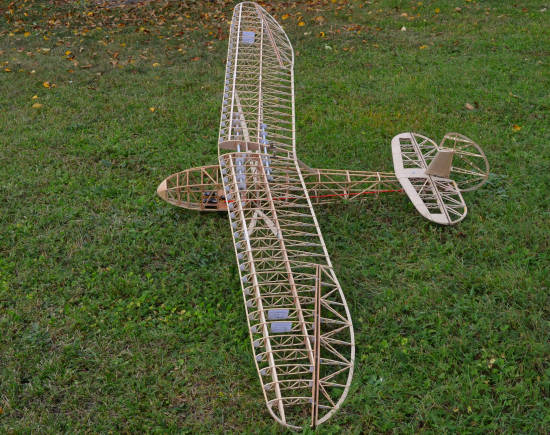
Hello everyone, I'm a new member of the retroplane forum. My name's Francesco and I'm from Italy (Pisa). I'm sorry not speaking both french and german... so you'll have to endure my bad english.
I "met" the Mugser MG12a by VincentB reading the pages of the Italian review "Modellismo" and I fell in love with its design. One thing that captured my attention was the challenging building technic used for the construction: VincentB designed a REAL small glider, not a model.
That thing of reproducing a scale model of the real plane using the same aeronautical building techniques was really interesting so... I decided to buy the plans from VincentB including the CAD files to have the wood CNC cut by a local service.
I'm using the MG12a as "training course" for an ambitious project I have: a Luton Minor L.A.4A 1:3 scale that I'm designing using the same thecniques used by VincentB. I have also all the original 1930s blueprints of the real aircraft to reproduce it in every detail.
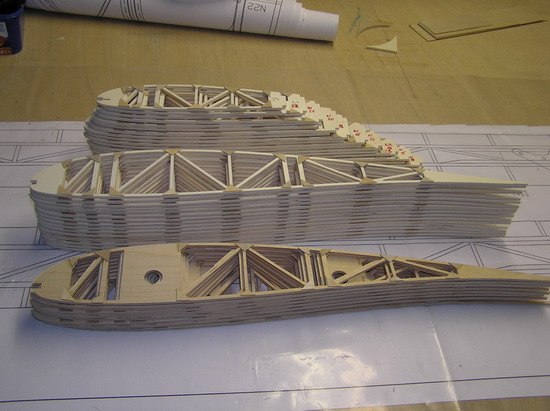
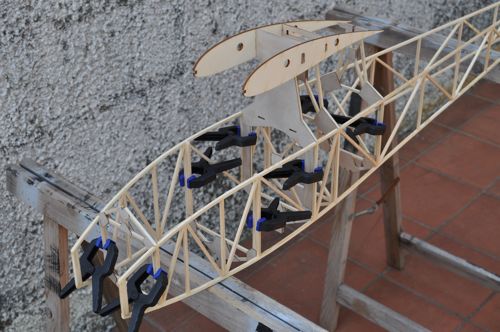
Back to the MG12a... I've started the building process one week ago and I'm now beginning to mount the fuselage.
Some pictures of my job.
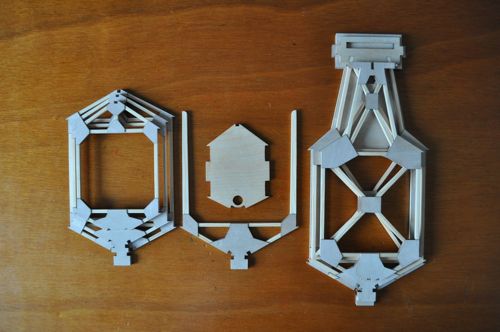
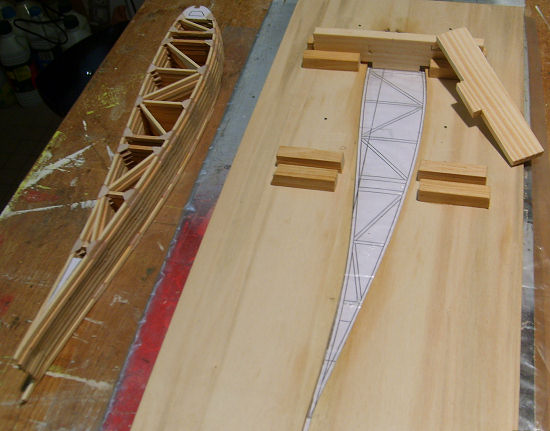
The formers
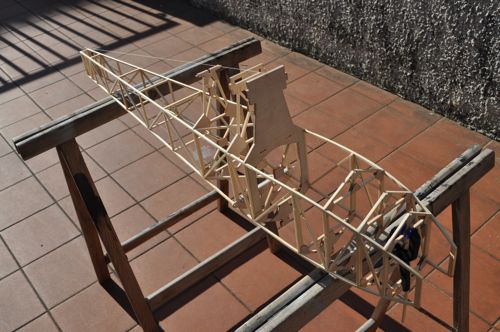
One side of the fuselage on the building board
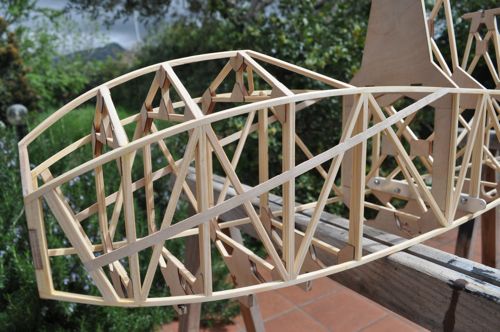
A try just to see if everything fits
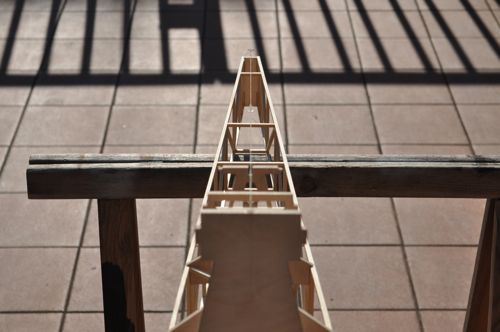
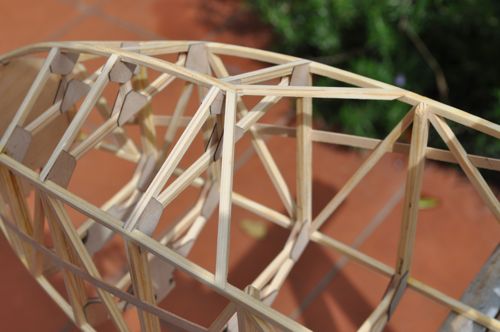
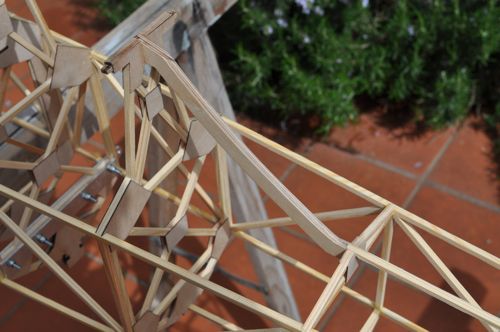
A detail of the cockpit area (I would like to be reduced to quarter scale...)
Detail

It won't be a "fast building", my job doesn't leave me really much time. It'll take its time 
See you soon
Francesco |
|
| Revenir en haut de page |
|
|
VincentB
Serial Posteur
Inscrit le: 23 Jan 2006
Localisation: A la playa, bajo el sol
Âge: 60
|
| Posté le: 25/03/2012 07:16 Sujet du message: |
|
|
|
Hi Francesco, welcome to the forum 
Great beginning, your building is very clean ![[good]](images/smiles/good.gif)
Retroplane et modélisme en pause, vanlife à haute dose. |
|
| Revenir en haut de page |
|
|
Brevino
Stagiaire Posteur
Inscrit le: 10 Mar 2012
Localisation: Pisa
Âge: 52
|
| Posté le: 28/03/2012 13:31 Sujet du message: Sructure of the fuselage almost completed |
|
|
|
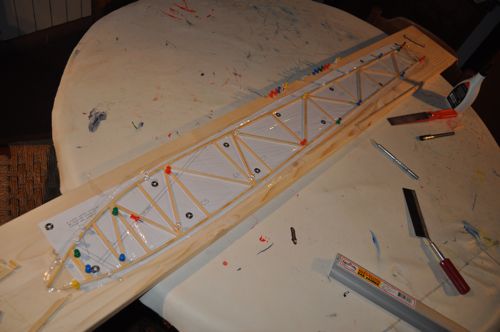
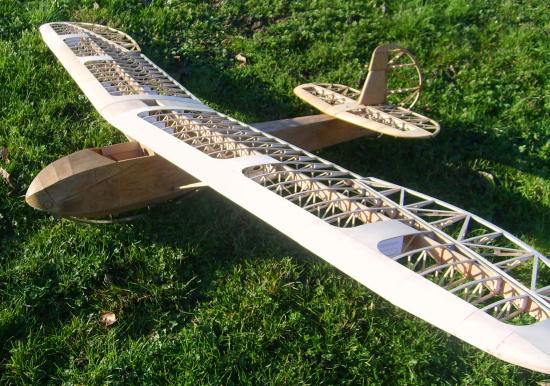
I've glued all but one (C1) formers to the sides of the fuselage. I have to admit that assemblig it has been a bit challenging. Keeping it straight require a lot of care. I've used a couple of cotton wires to be sure to avoid winning the "banana shaped fuselage award" for the current year.
I've also fixed the aluminum plate to connect the cabane struts.
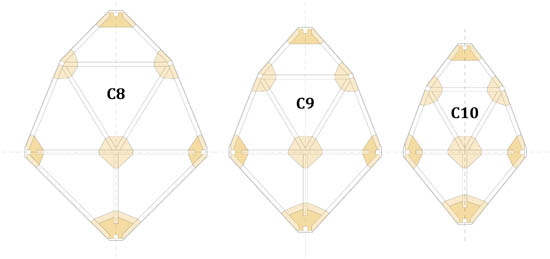
As you can see I've tack glued two additional diagonal rods between C7 and C8 to be sure that all the structure will be rigid. I won't remove them until the CPT covering of the bottom of this fuselage section will be completed and the wings joiner assembly will be in place.
And now some pictures:
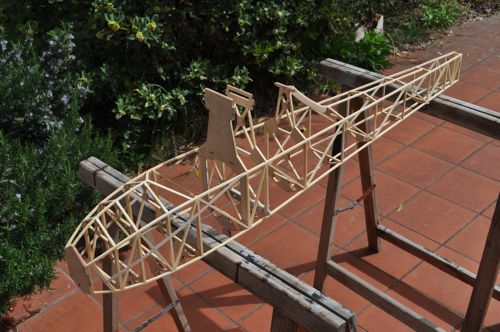
The fuselage
The alignment wire (one top and one bottom)
Cabane struts fixing plate
Additional tack glued rods between C7 and C8

C2-C3-C4... still lot of sanding required
|
|
| Revenir en haut de page |
|
|
VincentB
Serial Posteur
Inscrit le: 23 Jan 2006
Localisation: A la playa, bajo el sol
Âge: 60
|
| Posté le: 28/03/2012 14:04 Sujet du message: |
|
|
|
Great Francesco you work very fast, but very well
Retroplane et modélisme en pause, vanlife à haute dose. |
|
| Revenir en haut de page |
|
|
LV
Maniaco Posteur
Inscrit le: 12 Déc 2011
Localisation: Trencin
Âge: 58
|
| Posté le: 28/03/2012 22:15 Sujet du message: |
|
|
|
Beautiful work
Laco |
|
| Revenir en haut de page |
|
|
Brevino
Stagiaire Posteur
Inscrit le: 10 Mar 2012
Localisation: Pisa
Âge: 52
|
| Posté le: 30/03/2012 21:25 Sujet du message: |
|
|
|
Thank you! The structure of the fuselage is almost finished.
Before starting the wing spars and ribs I think I'll do some "training" with the empennage...
In the last two days during the lunch break at work I started drawing the PB.3. Praha in 1:4 scale. It's VincentB style ![[amen]](images/smiles/amen.gif) ... ...
|
|
| Revenir en haut de page |
|
|
VincentB
Serial Posteur
Inscrit le: 23 Jan 2006
Localisation: A la playa, bajo el sol
Âge: 60
|
| Posté le: 31/03/2012 05:53 Sujet du message: |
|
|
|
 no, it's simply full size style. Great project. You will build it after MG12a? no, it's simply full size style. Great project. You will build it after MG12a?
Retroplane et modélisme en pause, vanlife à haute dose. |
|
| Revenir en haut de page |
|
|
Brevino
Stagiaire Posteur
Inscrit le: 10 Mar 2012
Localisation: Pisa
Âge: 52
|
| Posté le: 31/03/2012 22:44 Sujet du message: |
|
|
|
« VincentB » a écrit: Great project. You will build it after MG12a?
Yes, the Praha it's the next project. The building of your MG12a is like discovering new territories for me and the next step must be self designed. The building should be simplier than the MG12a: wing with constant chord and no sweep angle, simplier empennage, simplier fuselage and less CPT covering for the wings and no stitches as it seems looking to some pictures taken in Praha of the real thing.
The CAD drawings will be finished soon... I'll send you a copy by email just to have an opinion. |
|
| Revenir en haut de page |
|
|
Anonyme
Serial Posteur
Inscrit le: 26 Jan 2006
|
| Posté le: 01/04/2012 09:21 Sujet du message: |
|
|
|
How long is the lunch break at work ??? 
Nice work and nice progress step ! Designing one's own model is always a great pleasure
PS : I do like your avatar ! |
|
| Revenir en haut de page |
|
|
Brevino
Stagiaire Posteur
Inscrit le: 10 Mar 2012
Localisation: Pisa
Âge: 52
|
|
| Revenir en haut de page |
|
|
Brevino
Stagiaire Posteur
Inscrit le: 10 Mar 2012
Localisation: Pisa
Âge: 52
|
| Posté le: 07/04/2012 13:35 Sujet du message: |
|
|
|
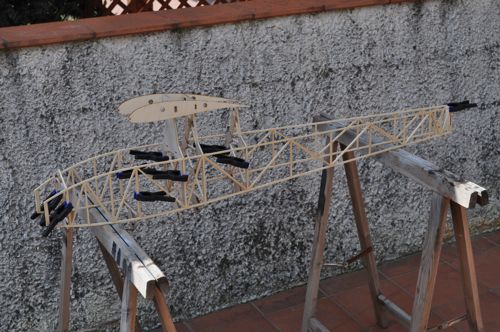
Some news from the Italian MG12a.
I'm posting some pictures of the building process:
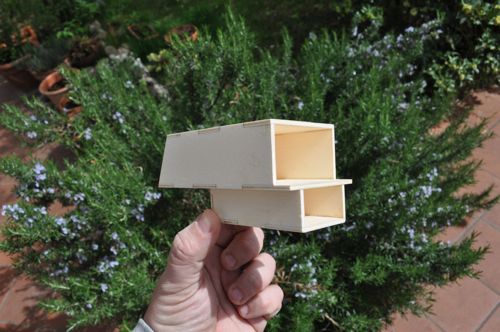
The boxes for the electronic equipment
The fuselage
Some details
The building has gone a bit forward than what illustrated in the pictures. All the structure that supports the landing skid is in place and the support plate of the stab has been prepared.
The design of the Praha has also gone ahead. When it will be ready to be reviewed I'll probably start a new discussion to ask some "aerodynamic advice". I have no experience with "vintage looking" wing profiles and experts will be welcome.
See you soon.
|
|
| Revenir en haut de page |
|
|
VincentB
Serial Posteur
Inscrit le: 23 Jan 2006
Localisation: A la playa, bajo el sol
Âge: 60
|
| Posté le: 07/04/2012 16:10 Sujet du message: |
|
|
|
Beautiful now look like a fuselage ![[arf]](images/smiles/arf.gif)
Retroplane et modélisme en pause, vanlife à haute dose. |
|
| Revenir en haut de page |
|
|
Brevino
Stagiaire Posteur
Inscrit le: 10 Mar 2012
Localisation: Pisa
Âge: 52
|
|
| Revenir en haut de page |
|
|
VincentB
Serial Posteur
Inscrit le: 23 Jan 2006
Localisation: A la playa, bajo el sol
Âge: 60
|
| Posté le: 02/05/2012 05:27 Sujet du message: |
|
|
|
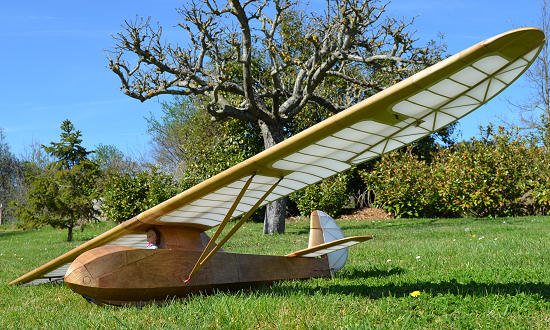
Je vous présente la construction du MG12a de Claude Leduc, commencée il y a un peu plus d'un an, le vol est pour bientôt

Retroplane et modélisme en pause, vanlife à haute dose. |
|
| Revenir en haut de page |
|
|
Brevino
Stagiaire Posteur
Inscrit le: 10 Mar 2012
Localisation: Pisa
Âge: 52
|
| Posté le: 07/05/2012 11:40 Sujet du message: |
|
|
|
Nice Job! It seems there are a lot of MG12a alla around Europe...
Mine is in StandBy, need to complete the building of a small RC plane (a Fleetwing by Dave Platt) just to have fun flying in the weekend without having something to complain if it decides to check how deep is the burrow of the mole... |
|
| Revenir en haut de page |
|
|
Brevino
Stagiaire Posteur
Inscrit le: 10 Mar 2012
Localisation: Pisa
Âge: 52
|
| Posté le: 20/11/2012 11:04 Sujet du message: I'm Back |
|
|
|
Hello, I'm back on the building process of the Mg12.
I've passed some months inattentive due to the fact that some other projects needed my attention.
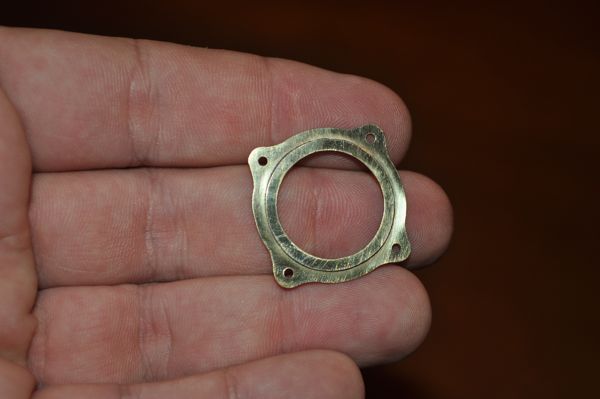
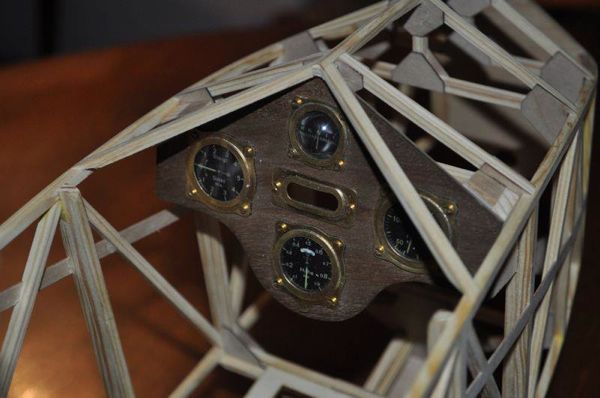
After some detail work on the fuselage (landing skid, servo bay, linkages to the tail assembly) I started making the instrument panel.
Here are my efforts from last night... 
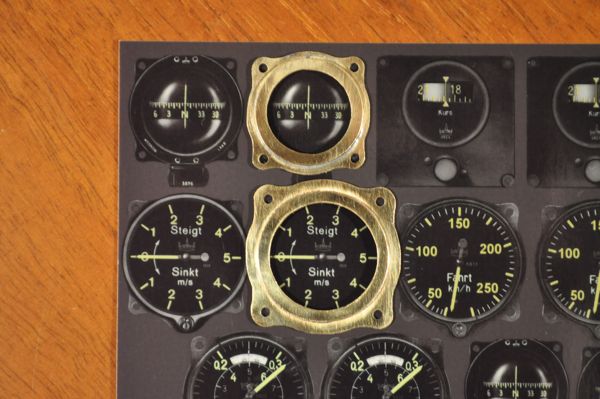
The frame of the Attitude Indicator
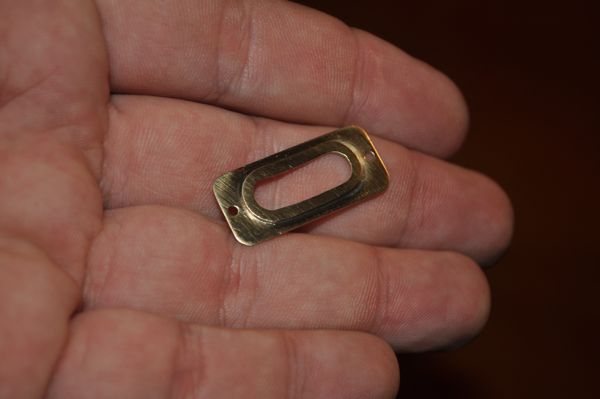
The frame of the VSI or Airspeed Indicator
A try on the instruments picture
A try on the Instruments Panel
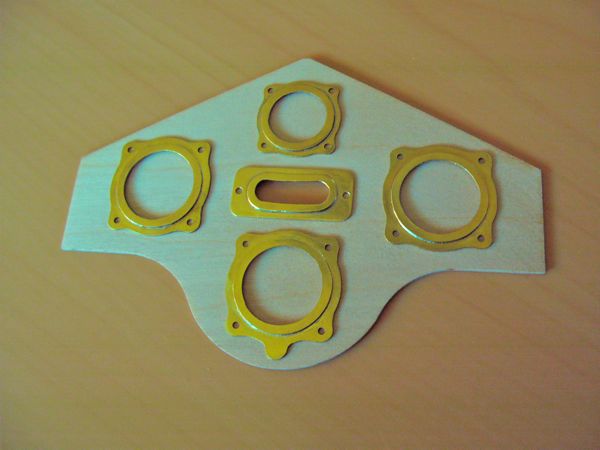
I'll need a small brass gear to simulate the knob on the Altimeter and a small sheet of veneer for covering the birch CPT.
I've started to try the building process of the wing ribs... a looong winter in the workshop is waiting for me.
By the time the tail assembly will be a nice training.
Pictures will follow. |
|
| Revenir en haut de page |
|
|
VincentB
Serial Posteur
Inscrit le: 23 Jan 2006
Localisation: A la playa, bajo el sol
Âge: 60
|
|
| Revenir en haut de page |
|
|
Brevino
Stagiaire Posteur
Inscrit le: 10 Mar 2012
Localisation: Pisa
Âge: 52
|
|
| Revenir en haut de page |
|
|
Brevino
Stagiaire Posteur
Inscrit le: 10 Mar 2012
Localisation: Pisa
Âge: 52
|
| Posté le: 24/11/2012 22:30 Sujet du message: Instrument Panel |
|
|
|
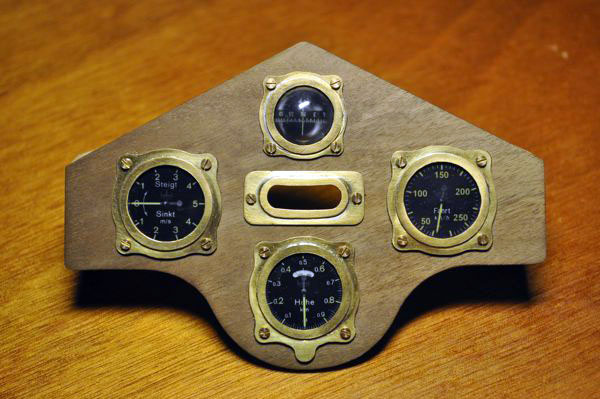
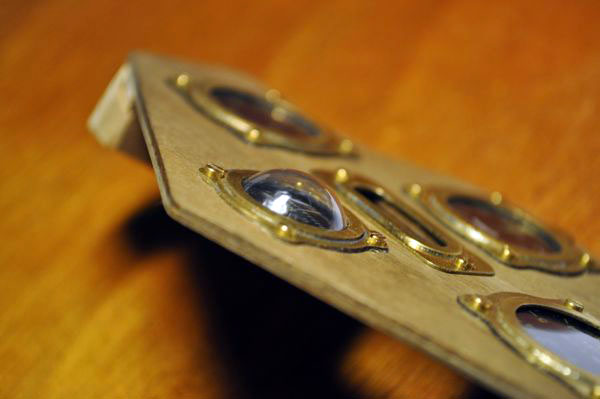
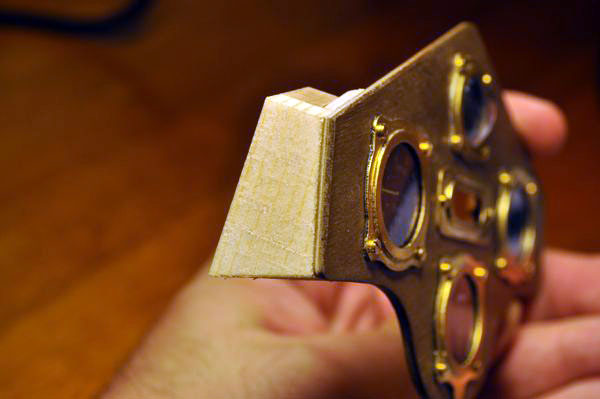
The instrument panel is almost finished.
I've chosen a black walnut (here in Italy we call it American walnut) finish for the panel. I've decided for a satin finish obtained using wax. I'm going to make the Attitude Indicator like the working one I've seen in the Stéphane's MG12a building log. An empty fuse: he's really smart!
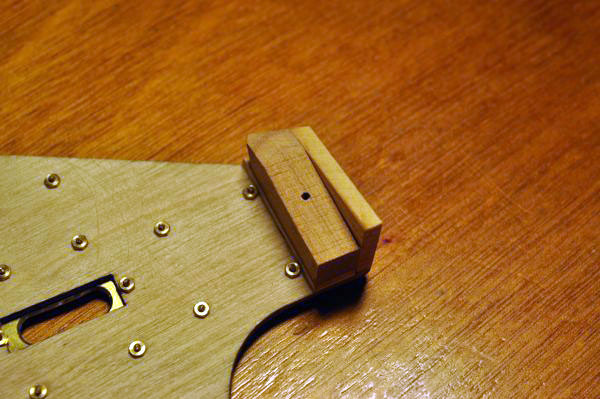
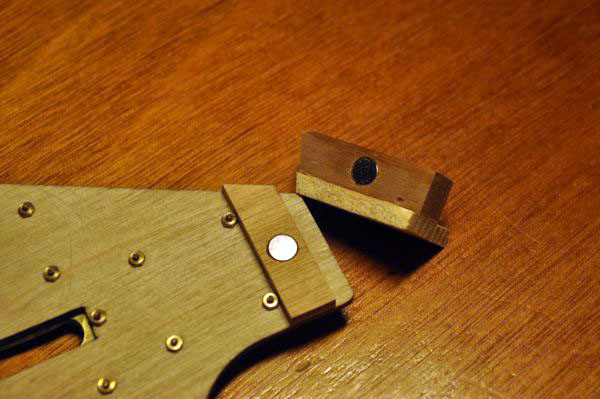
The panel is kept in place by two neodimium magnets. Everything's clear in the following pictures.
Still missing both the knob of the altimeter and the rope release lever.
|
|
| Revenir en haut de page |
|
|
Brevino
Stagiaire Posteur
Inscrit le: 10 Mar 2012
Localisation: Pisa
Âge: 52
|
| Posté le: 19/12/2012 13:07 Sujet du message: |
|
|
|
Some other pictures of my work in progress.
The instrument panel in place (the magnets works great)
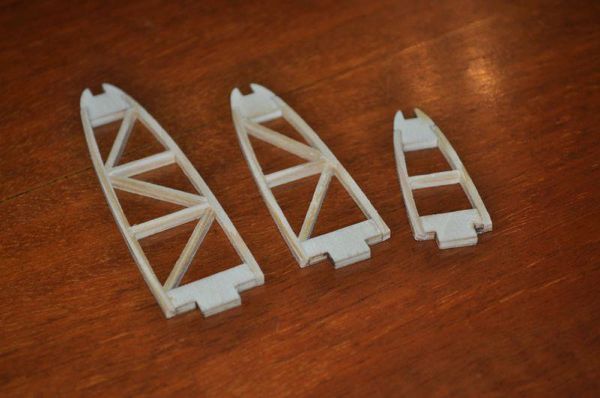
Rudder in construction
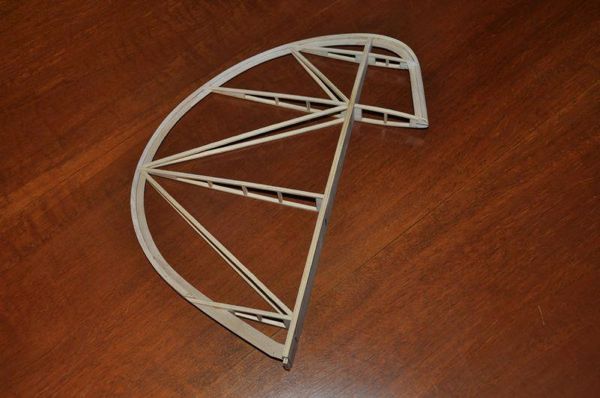
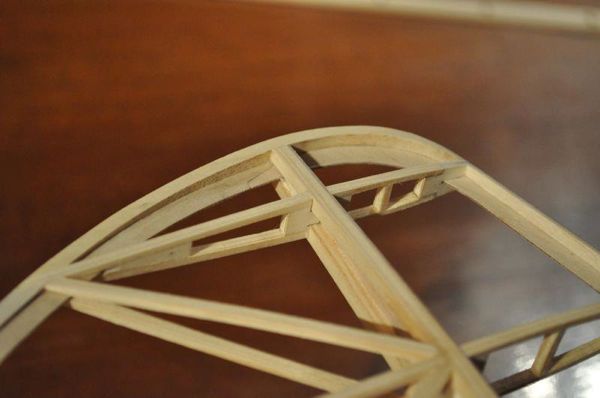
Ribs of the fin
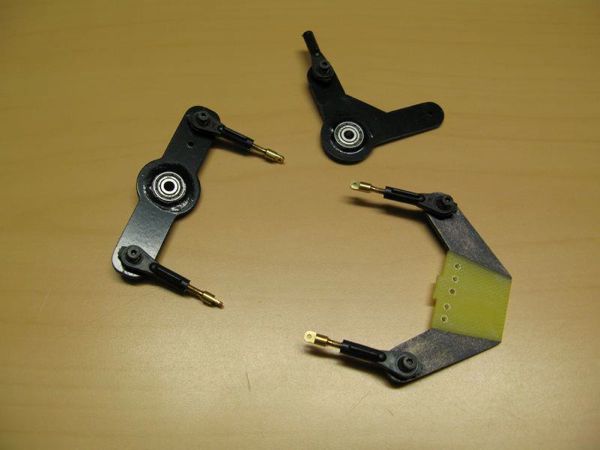
Linkages
And here http://youtu.be/94hIN4dggqc you can find a short video of the finished instruments panel with the working attitude indicator. Many thanks to Stéphane for the idea: I owe you a beer
This week end I'm going to finish the fin-rudder assembly and the fittings installation for the rudder and elevator linkages |
|
| Revenir en haut de page |
|
|
|