| Voir le sujet précédent :: Voir le sujet suivant |
| Auteur |
Message |
Orionis
Incurable Posteur


Inscrit le: 31 Aoû 2006

Localisation: Drôme
Âge: 58

|
 Posté le: 04/09/2014 11:57 Sujet du message: Posté le: 04/09/2014 11:57 Sujet du message: |
  |
|
|
Nice and quick building, Oliver! ![[clap]](images/smiles/Clap.gif)

Fabrice |
|
| Revenir en haut de page |
|
 |
OliverPrinz
Apprenti Posteur

Inscrit le: 30 Mar 2010

Localisation: Baden-Württemberg
Âge: 58

|
| Posté le: 24/09/2014 18:08 Sujet du message: wings done |
|
|
|
Hi,
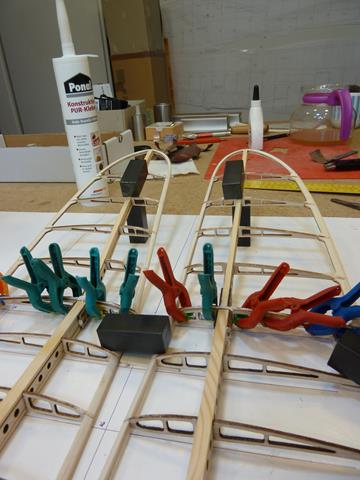
Time passes by so quickly, but at least the two wing parts are ready.
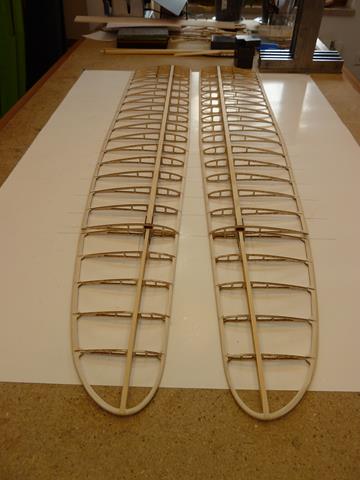
To glue the outer wing parts to the main wings I used a PUR-glue.
This sort expands while "drying" and fills out all gaps.
Nice to handle (but use gloves) and not so much rush as I expected.
|
|
| Revenir en haut de page |
|
|
OliverPrinz
Apprenti Posteur
Inscrit le: 30 Mar 2010
Localisation: Baden-Württemberg
Âge: 58
|
| Posté le: 27/09/2014 17:08 Sujet du message: rack for the fuselage cone |
|
|
|
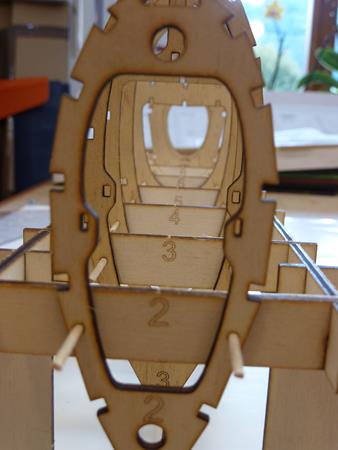
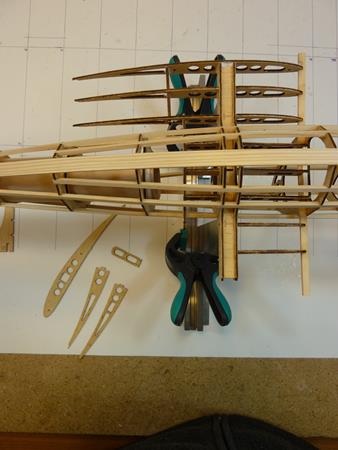
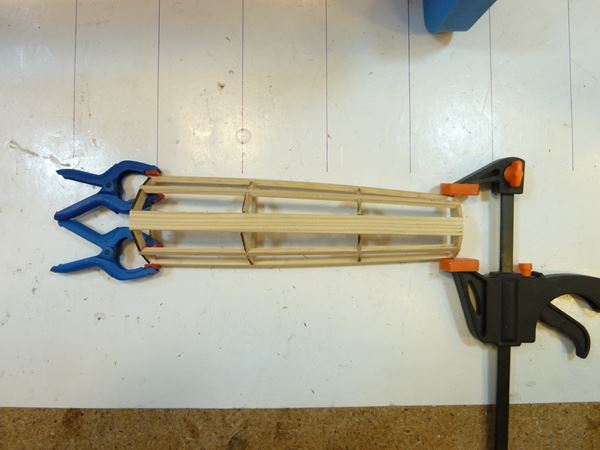
It's quite easy to establish the rack for the fuselage cone
(if one keep everything straight and rectangular)
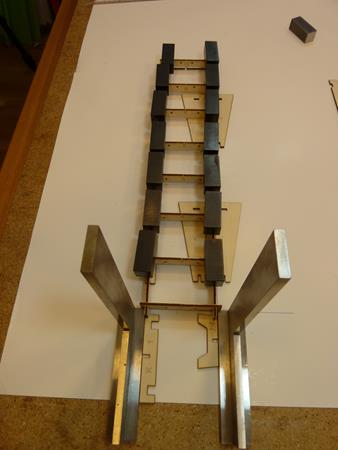
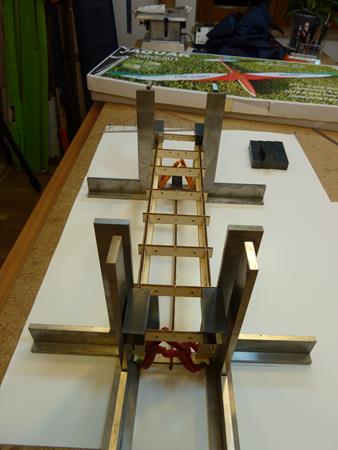
There is even a little stand for the end of the fuselage. Very good idea.
This way cone and end can be aligned really well (you will see later on).
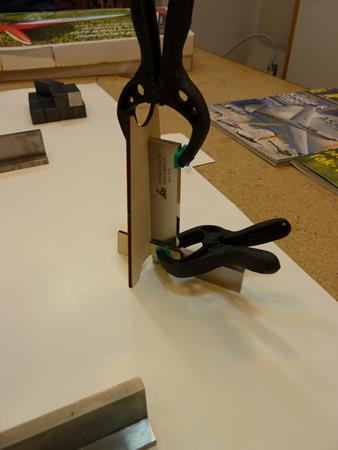
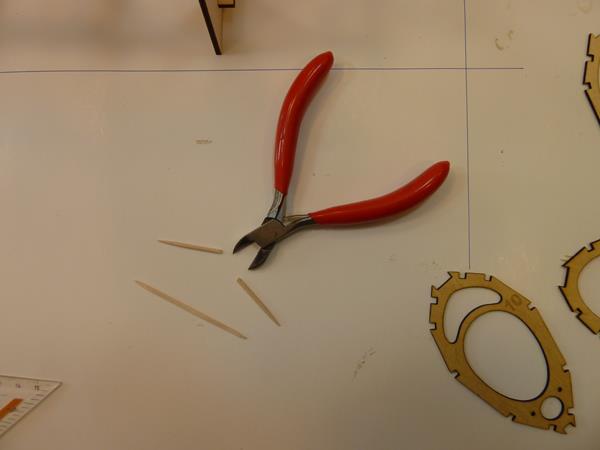
Another nice idea is using tooth picks to plug the former onto the rack.
|
|
| Revenir en haut de page |
|
|
OliverPrinz
Apprenti Posteur
Inscrit le: 30 Mar 2010
Localisation: Baden-Württemberg
Âge: 58
|
| Posté le: 28/09/2014 15:44 Sujet du message: fuselage on its way |
|
|
|
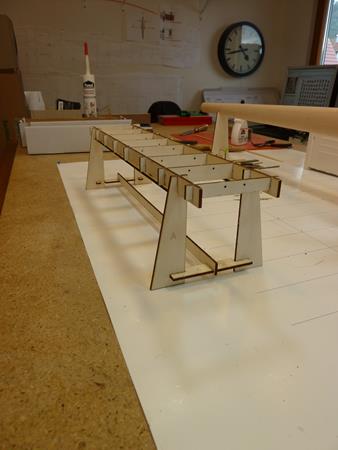
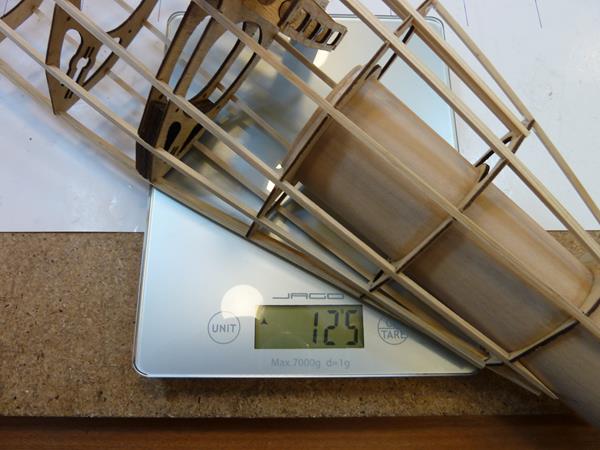
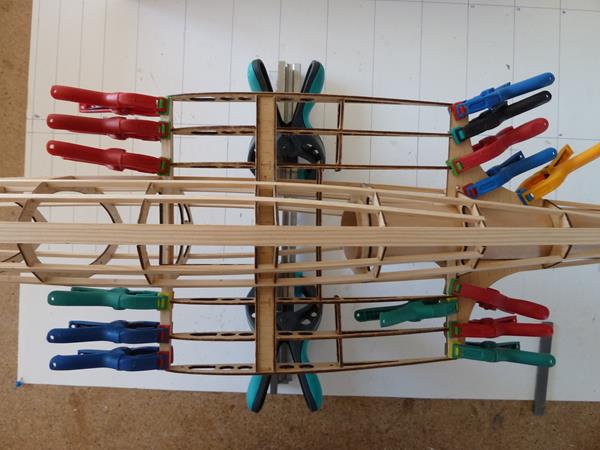
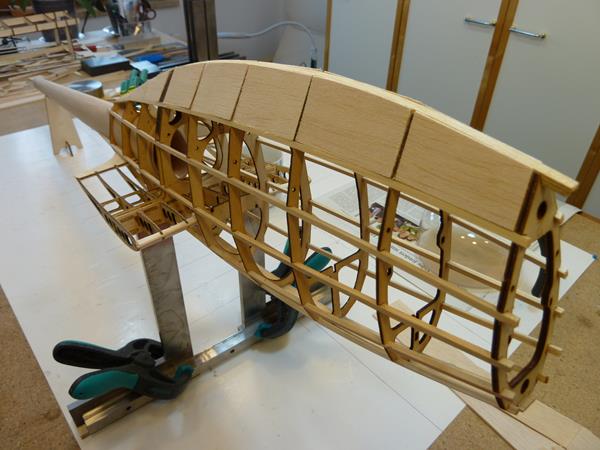
Using a few (12) pine strips the fuselage is coming up
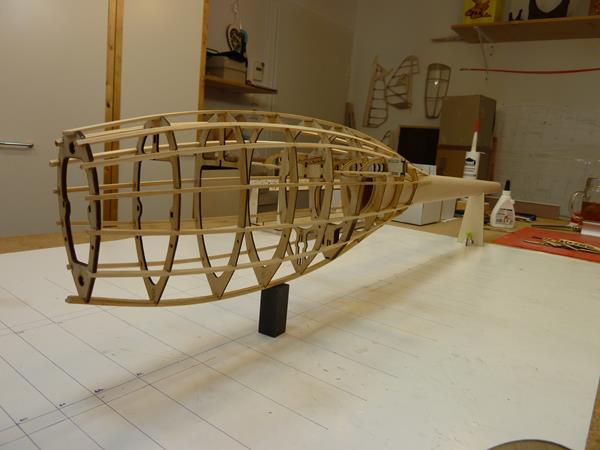
the weight so far for the fuselage
|
|
| Revenir en haut de page |
|
|
Beat
Accro Posteur

Inscrit le: 18 Déc 2007

Localisation: Schweiz
Âge: 62

|
|
| Revenir en haut de page |
|
|
OliverPrinz
Apprenti Posteur
Inscrit le: 30 Mar 2010
Localisation: Baden-Württemberg
Âge: 58
|
| Posté le: 28/09/2014 17:27 Sujet du message: no additional balsa in the kit |
|
|
|
Hi Beat,
Please don't mind if I stay to English (for all international readers/followers).
Your're right, there is no balsa for fillings like for leading/trailing edges and nothing for the "nose" in the kit.
But this kit I would recommend for experienced builders only. And "they" have balsa pieces "on stock" (like me  ). ).
Oliver. |
|
| Revenir en haut de page |
|
|
Beat
Accro Posteur
Inscrit le: 18 Déc 2007
Localisation: Schweiz
Âge: 62
|
| Posté le: 28/09/2014 20:04 Sujet du message: |
|
|
|
Hi Oliver
Thanks for the advice. Sure I have some wooden blocks in stock 
I just was not sure, if there is no wood included because my Jaguar box was opened and examinated more then once at the Retroplane event.
I will go with some pine block instead of balsa. Actually I didnt start (I have to finish my Rhonsperber first)
Thanks a lot for all your building advice, it will be of great use at the time.
Best regards and greetings to your stewardes 
Beat
www.retroplane.ch
www.rhoensperber.ch
www.beatbachmann.com |
|
| Revenir en haut de page |
|
|
OliverPrinz
Apprenti Posteur
Inscrit le: 30 Mar 2010
Localisation: Baden-Württemberg
Âge: 58
|
| Posté le: 04/10/2014 20:03 Sujet du message: few inner rips |
|
|
|
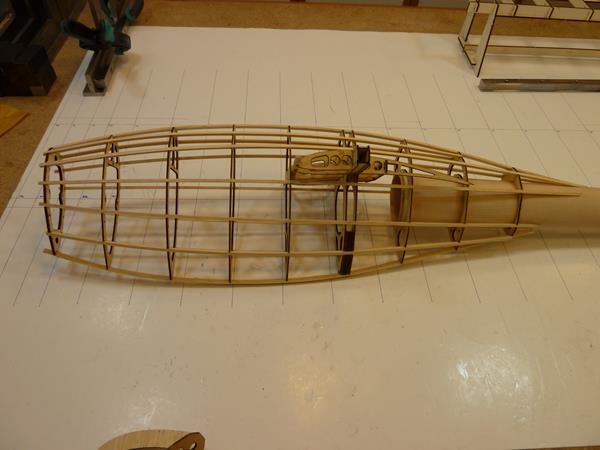
Gluing in the rips starting off the fuselage.
And again filling up the gaps with balsa.
|
|
| Revenir en haut de page |
|
|
Anonyme
Serial Posteur


Inscrit le: 26 Jan 2006

|
| Posté le: 04/10/2014 20:19 Sujet du message: |
|
|
|
| The Jaguar will be surely an impressive beast in the air, quite a clean, neat and delicate work ! |
|
| Revenir en haut de page |
|
|
OliverPrinz
Apprenti Posteur
Inscrit le: 30 Mar 2010
Localisation: Baden-Württemberg
Âge: 58
|
| Posté le: 09/10/2014 19:00 Sujet du message: fill-ins, hook |
|
|
|
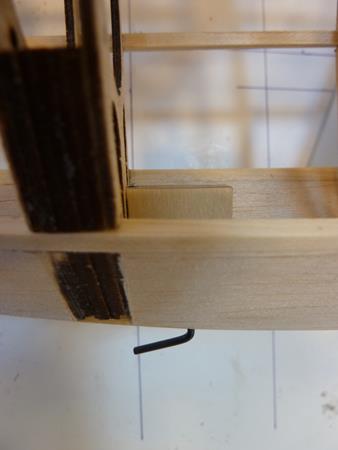
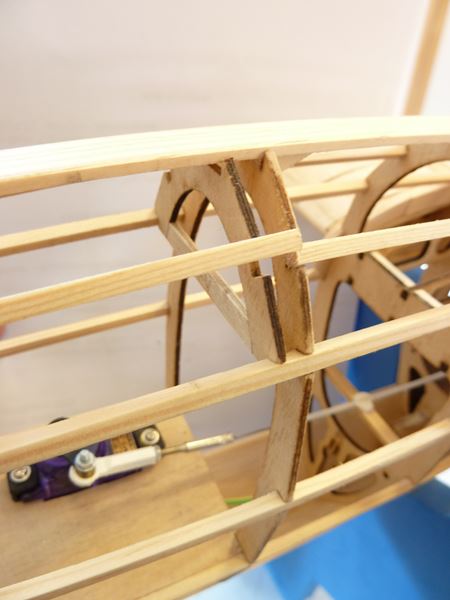
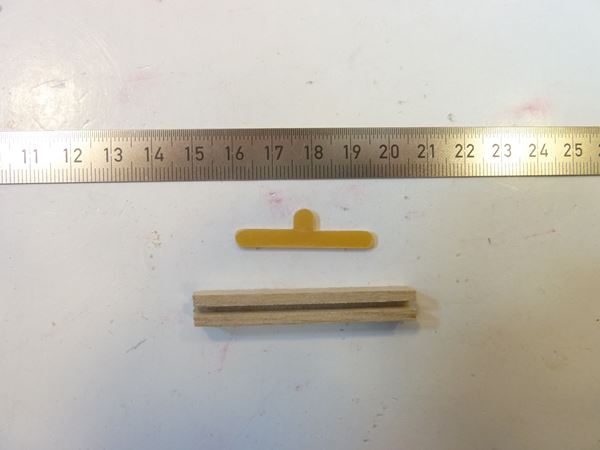
Having only pine strips will be not enough for a bit rougher landing. So there is the need of fill-ins between the ribs
Some hours later, all parts fit in with right angles to each strip ... good feeling
In the kit there is a mechanic for the tow-hook. It's a very nice thing, but it needs a servo too.
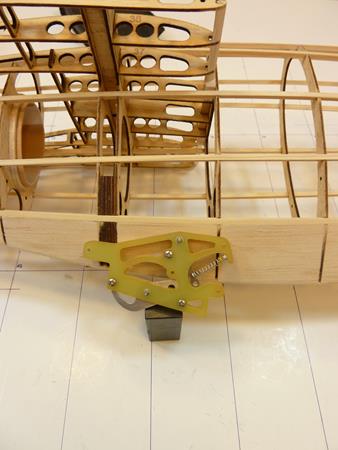
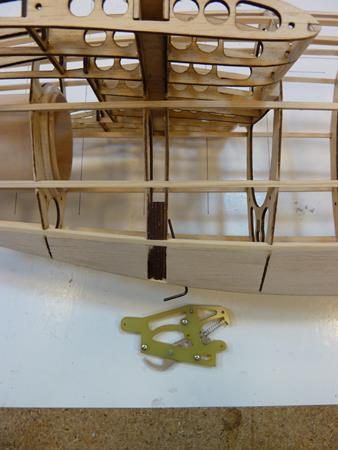
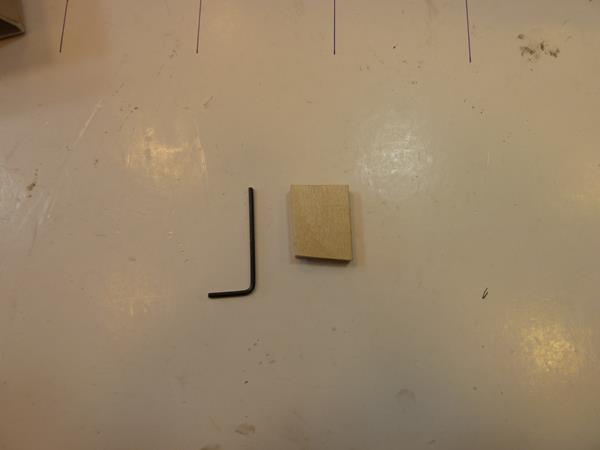
I'm going to save this weight in install a common hook.
Therefor I use a normal inbus tool and glue it in using resin.
|
|
| Revenir en haut de page |
|
|
OliverPrinz
Apprenti Posteur
Inscrit le: 30 Mar 2010
Localisation: Baden-Württemberg
Âge: 58
|
| Posté le: 05/11/2014 09:37 Sujet du message: 3-dimensional balsa |
|
|
|
To get good results for the cover it necessary to place some balsa strips onto the fuselage:
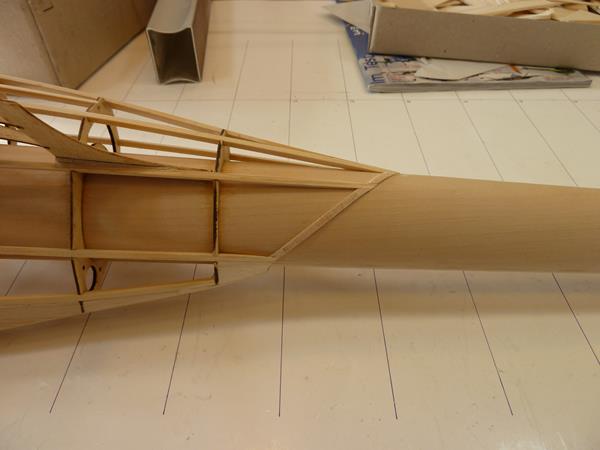
Unbelievable how much time this work needed:

... but it's done and the passage is very smooth. Ufff ![[arf]](images/smiles/arf.gif) |
|
| Revenir en haut de page |
|
|
Orionis
Incurable Posteur
Inscrit le: 31 Aoû 2006
Localisation: Drôme
Âge: 58
|
| Posté le: 05/11/2014 20:03 Sujet du message: |
|
|
|
Still perfect building!
Fabrice |
|
| Revenir en haut de page |
|
|
OliverPrinz
Apprenti Posteur
Inscrit le: 30 Mar 2010
Localisation: Baden-Württemberg
Âge: 58
|
| Posté le: 08/11/2014 15:05 Sujet du message: the nose |
|
|
|
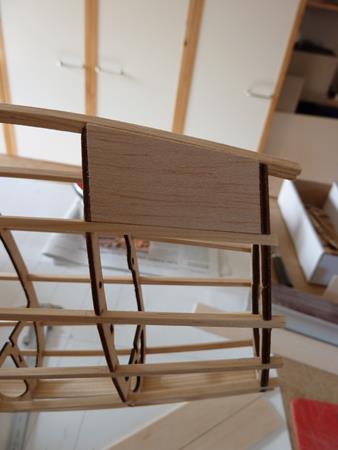
Next step: the nose, it should be made out of balsa.
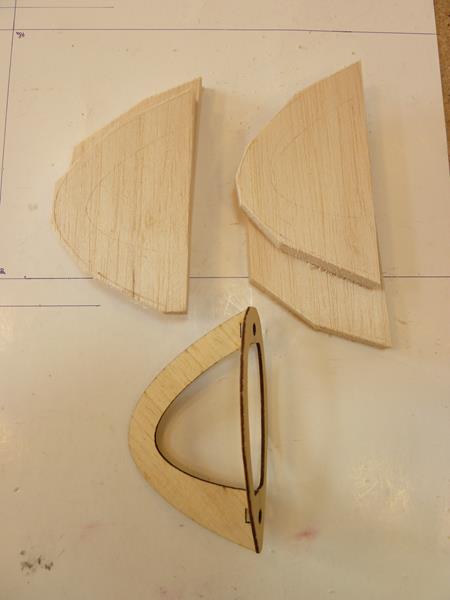
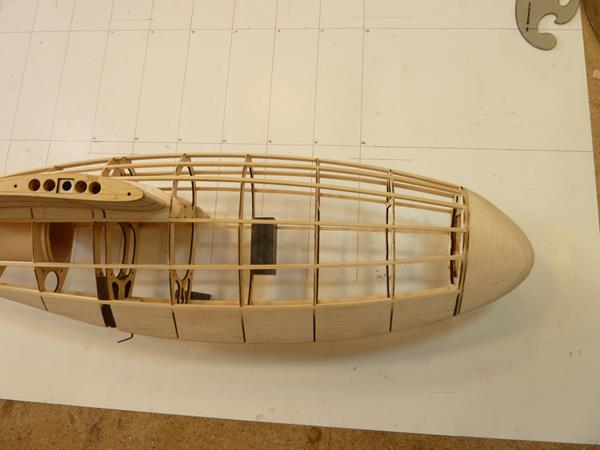
But I did a mistake: I've tried to save balsa (which is totally nonsense!) and saved to much.
Result: during sanding a hole !!! This nose is useless ![[argh]](images/smiles/argh.gif)
Ok. My fault. New nose.
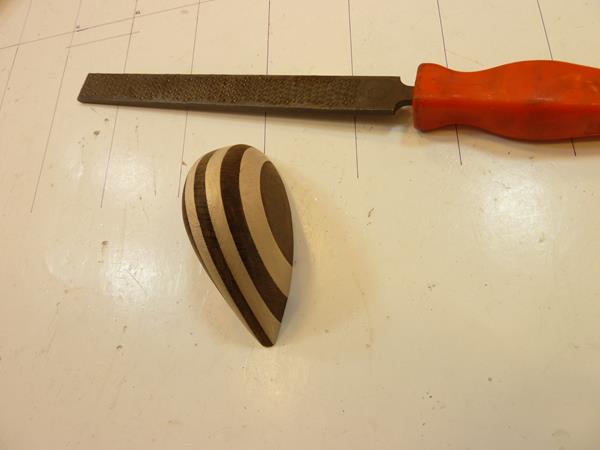
Honestly, the curve of this kit-nose I do not like too much. Lets find a new shape:
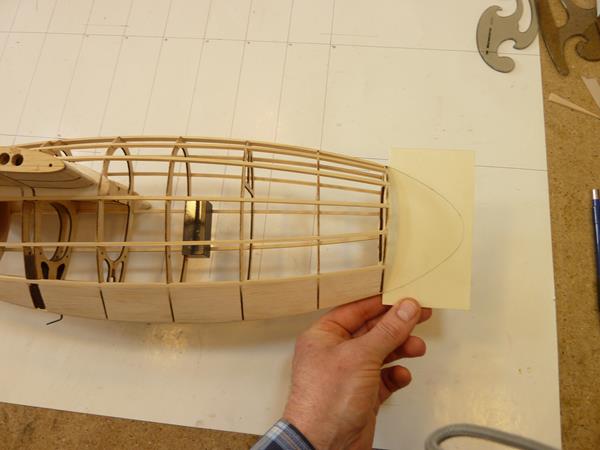
Meanwhile my friend Emil convinced me to put much more effort into this part, I should build "somthing special".
Due to the laser-cut all parts have brown-black edges. Wouldn't it be nice having a nose again in brown-black and white? My investigation of internet brought up these kind of wood: wenge (millettia laurentii) + maple. Both available in 5mm (x100x1000).
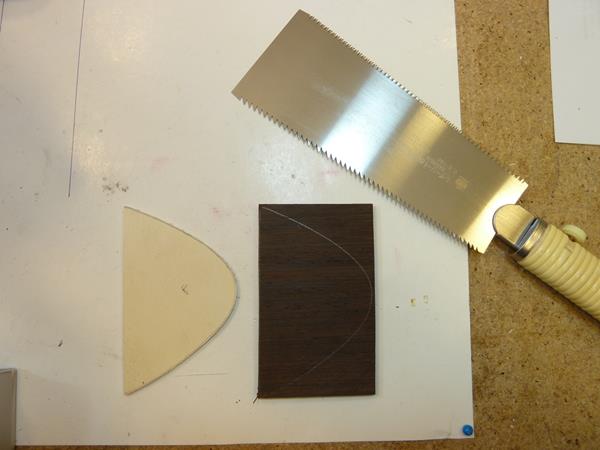
Ohlala, this nose weighs 107g  for this kind of glider having 800-900g lift-off-weight, no chance. for this kind of glider having 800-900g lift-off-weight, no chance.
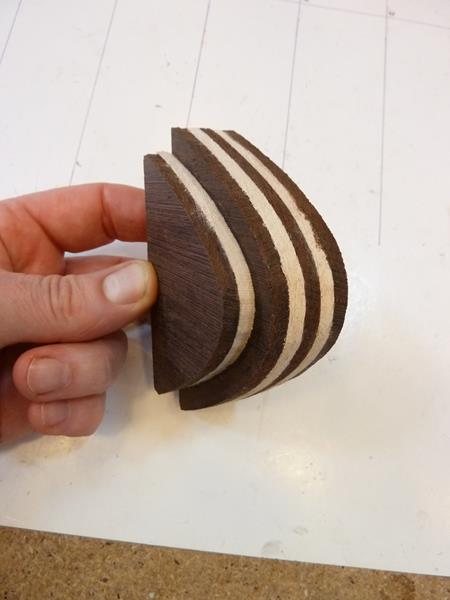
But still I kept on going, finding out how this sandwich-material can be handled. Many hours later, using just this rasp/file the weight dropped to 68g. Not bad, but still not good enough.
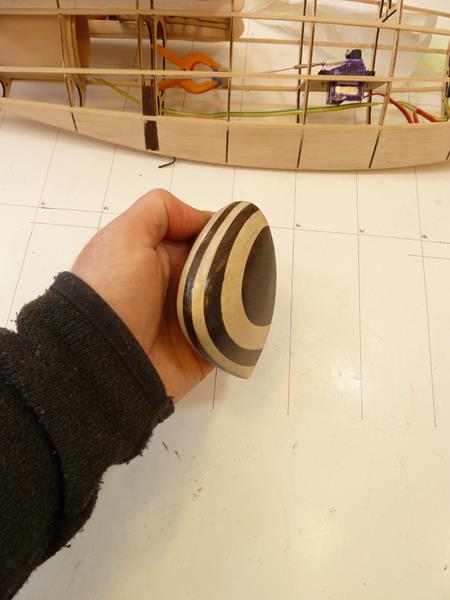
Using a little mill I stripped down "the interior space". What a noise and dust ![[oumff]](images/smiles/oumff.gif)
Now the nose weighs 47g. Good enough? ![[humm]](images/smiles/humm.gif) Let's give it a try. Let's give it a try.
To preserve the wood I varnished it with water-based sealing. 3 layers including sanding "in-between" the layers).
I'm pleased about this result
|
|
| Revenir en haut de page |
|
|
Anonyme
Serial Posteur
Inscrit le: 26 Jan 2006
|
| Posté le: 08/11/2014 15:12 Sujet du message: |
|
|
|
| Lovely bicolor nose... and for all the work also.. |
|
| Revenir en haut de page |
|
|
VincentB
Serial Posteur

Inscrit le: 23 Jan 2006

Localisation: A la playa, bajo el sol
Âge: 60
|
| Posté le: 08/11/2014 15:37 Sujet du message: |
|
|
|
I like too your black and white nose ![[good]](images/smiles/good.gif)
What is the model of your japanese saw? when I will be rich I will buy one 
Retroplane et modélisme en pause, vanlife à haute dose. |
|
| Revenir en haut de page |
|
|
OliverPrinz
Apprenti Posteur
Inscrit le: 30 Mar 2010
Localisation: Baden-Württemberg
Âge: 58
|
| Posté le: 08/11/2014 15:56 Sujet du message: japanese saw |
|
|
|
Salut Vincent,
These japanese saws aren't that expensive. Years ago I've bought a whole set of them.
I would recommmend at least this one: it's only 0,3mm thick Dozuki Universal Compact
A bientôt,
Oliver. |
|
| Revenir en haut de page |
|
|
OliverPrinz
Apprenti Posteur
Inscrit le: 30 Mar 2010
Localisation: Baden-Württemberg
Âge: 58
|
| Posté le: 09/11/2014 17:48 Sujet du message: |
|
|
|
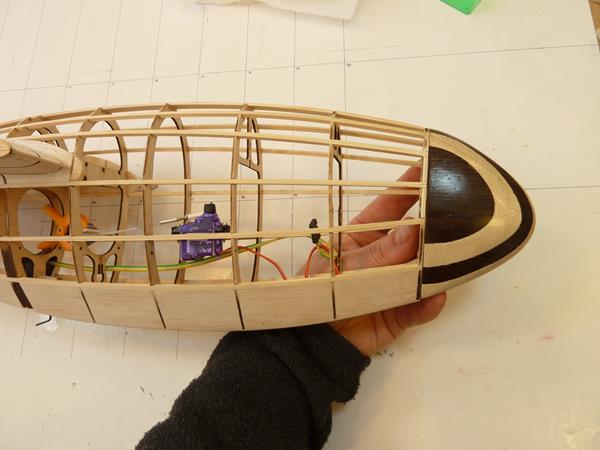
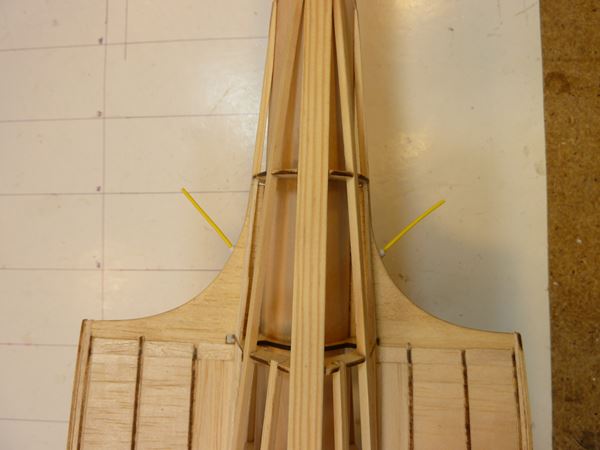
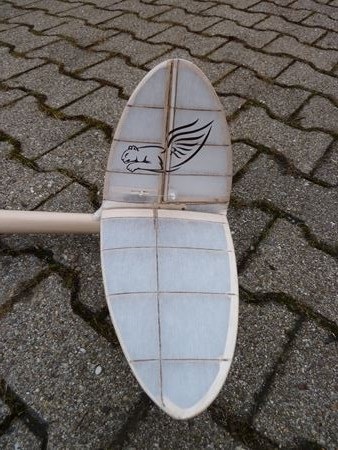
The tail unit was fix to the fuselage.
Wings and fuselage nicely positioned and aligned to it precisely.
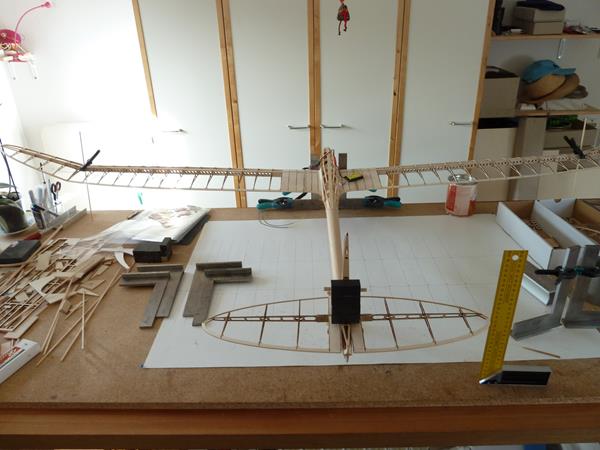
Today is the day: work on wood is done
|
|
| Revenir en haut de page |
|
|
Miguel Gil
Apprenti Posteur
Inscrit le: 13 Oct 2008

Localisation: Madrid
Âge: 67

|
| Posté le: 09/11/2014 19:15 Sujet du message: |
|
|
|
Great job, I really like the nose bicolor
A question for you or any other fellow who had done
Is it possible to dye the balsa to get a similar effect?
Regards,
Miguel. |
|
| Revenir en haut de page |
|
|
Roger_Vettorel
Fidèle Posteur

Inscrit le: 07 Nov 2011
Localisation: Montbéliard
Âge: 71
|
| Posté le: 09/11/2014 21:16 Sujet du message: Jaguàr of Paco Model |
|
|
|
Superbe Oliver !
Très beau kit et parfaite réalisation ![[amen]](images/smiles/amen.gif)
Moi aussi j'aime beaucoup le "black and white nose ".
Un peu d'entoilage et ça vole bientôt....
Viele Grüße
Roger |
|
| Revenir en haut de page |
|
|
OliverPrinz
Apprenti Posteur
Inscrit le: 30 Mar 2010
Localisation: Baden-Württemberg
Âge: 58
|
| Posté le: 09/11/2014 22:44 Sujet du message: dying balsa |
|
|
|
Salut Miguel,
Citation: Is it possible to dye the balsa to get a similar effect?
In principle it's possible to dye balsa. But ... if you try to get a straight separation of colour, this will not be possible. Balsa sucks ink/varnish/etc too easily into its fibers.
What you could try: make a "nose" out of balsa, varnish it with 2-3 layers (close all balsa fibers) and afterwards you could apply colour onto the varnish.
A bientôt,
Oliver.[/quote] |
|
| Revenir en haut de page |
|
|
Clifton
Psycho Posteur


Inscrit le: 07 Mai 2014
Localisation: Anjou
Âge: 61
|
| Posté le: 09/11/2014 23:31 Sujet du message: |
|
|
|
Very nice work and beautiful model. I like very much that such of antic models.
So good this idea for the nose. It looks very nice.
Philippe
Slingsby Petrel, à mon gout le plus beau de tous, quoi que le Fafnir ... Ah ces ailes en mouette, un jour ....
Rien de ce qui est fini n'est jamais achevé tant que tout ce qui est commencé n'est pas totalement terminé (Pierre Dac) |
|
| Revenir en haut de page |
|
|
OliverPrinz
Apprenti Posteur
Inscrit le: 30 Mar 2010
Localisation: Baden-Württemberg
Âge: 58
|
| Posté le: 13/12/2014 17:19 Sujet du message: opening |
|
|
|
Salut à tous,
Sorry for this delay in reporting. The next couple of weeks will be better.
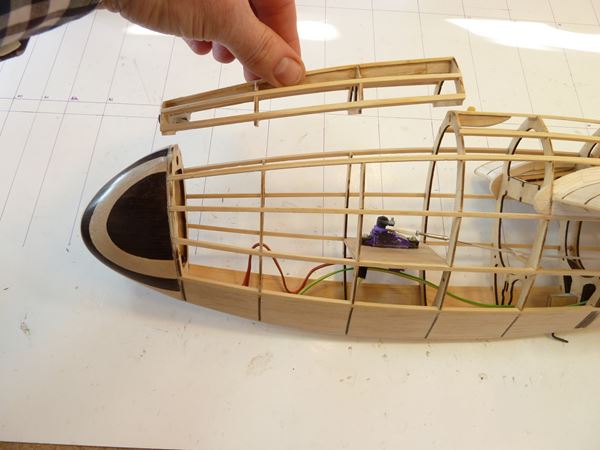
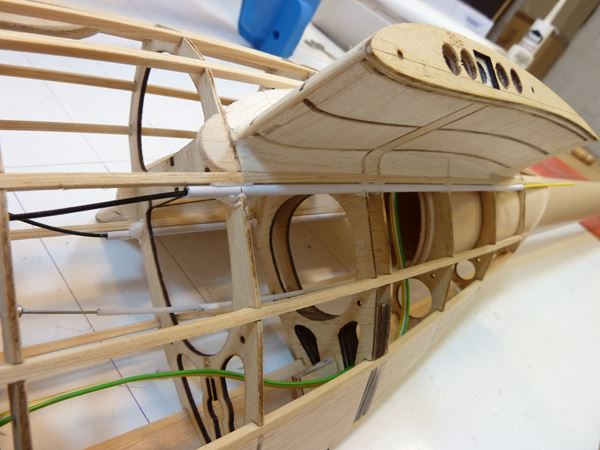
The constructor has designed the nose to be removable for entering the fuselage. There could be some magnets holding the entire nose. But for me (and my fingers) this is not big enough. I decided to make an opening from the top (as usual).
First I had to double some parts of formers to be able to cut the strings for the opening.

Comment for those who want to do the same:
It would have been better to water all the strings, because if glued in without them being watered, they hold a lot of tension. As soon as you use your saw, they "jump back" into a straighter position which makes it difficult to keep them in a bend position.
I had to glue in a lot of additional braces to keep the strings in round shape
Using a rest of fiber and a bit of Paulownia wood I've created a "look for this opening.
At the end, there's a bigger opening to make it possible to see and manipulate everything in the fuselage.
Hope you like it 
|
|
| Revenir en haut de page |
|
|
Orionis
Incurable Posteur
Inscrit le: 31 Aoû 2006
Localisation: Drôme
Âge: 58
|
|
| Revenir en haut de page |
|
|
OliverPrinz
Apprenti Posteur
Inscrit le: 30 Mar 2010
Localisation: Baden-Württemberg
Âge: 58
|
| Posté le: 15/12/2014 18:49 Sujet du message: a bit of RC |
|
|
|
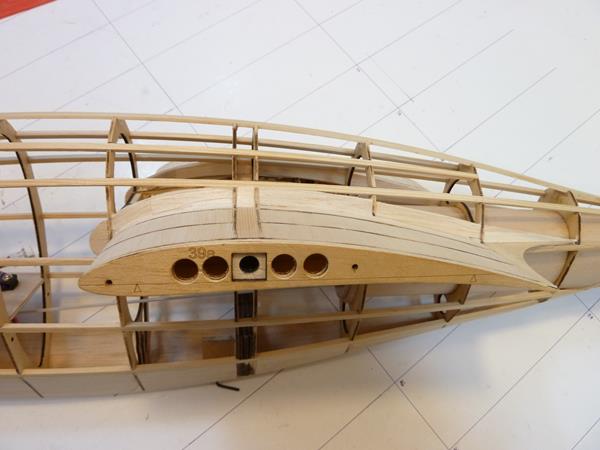
Unfortunately there is nearly 100g of weight needed in the nose to set up the right point of gravity
This way the glider weighs (still without varnish) nearly 700g.
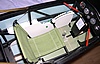
Here are some impressions of "my remote"
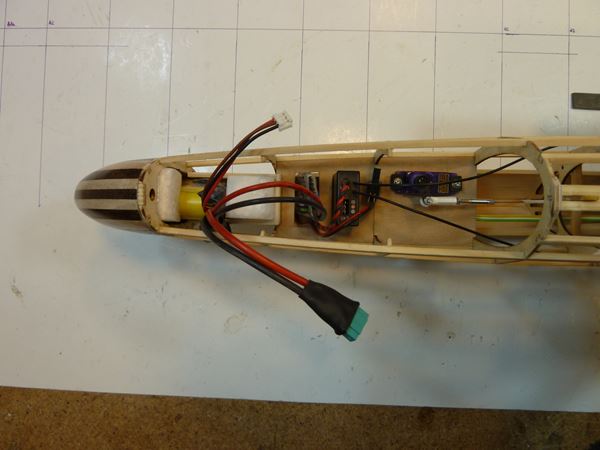
One of my favorites are pipes for the receiver antennas to keep them in a 90° angle and (of course) for protection and easy removability
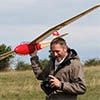
Now it's time for the gas mask and lots of dope... |
|
| Revenir en haut de page |
|
|
Christian
Serial Posteur
Inscrit le: 02 Mai 2006
Localisation: Europe
Âge: 61

|
| Posté le: 15/12/2014 19:10 Sujet du message: |
|
|
|
Magnifique
Christian

Orlik en construction |
|
| Revenir en haut de page |
|
|
Frédéric
Psycho Posteur

Inscrit le: 22 Juin 2006

Localisation: Corrèze
Âge: 59

|
| Posté le: 15/12/2014 20:01 Sujet du message: |
|
|
|
Salut Oliver !
Chapeau bas !
Amicalement
Frédéric

"L'eau plate ne favorise pas le vol de pente." Otto Lilienthal
"In Cyano véritas" Michel Coneuf
"Veni, bibi, vomi" Pasqual VOMITINO
Retroplane fort et vert ! |
|
| Revenir en haut de page |
|
|
stéphane monot
Accro Posteur
Inscrit le: 08 Mai 2010
Localisation: Domloup (35)
Âge: 55
|
| Posté le: 15/12/2014 20:08 Sujet du message: |
|
|
|
C'est très beau cette dentelle.
Stéphane |
|
| Revenir en haut de page |
|
|
OliverPrinz
Apprenti Posteur
Inscrit le: 30 Mar 2010
Localisation: Baden-Württemberg
Âge: 58
|
| Posté le: 24/12/2014 17:42 Sujet du message: mistakes needs to be done |
|
|
|
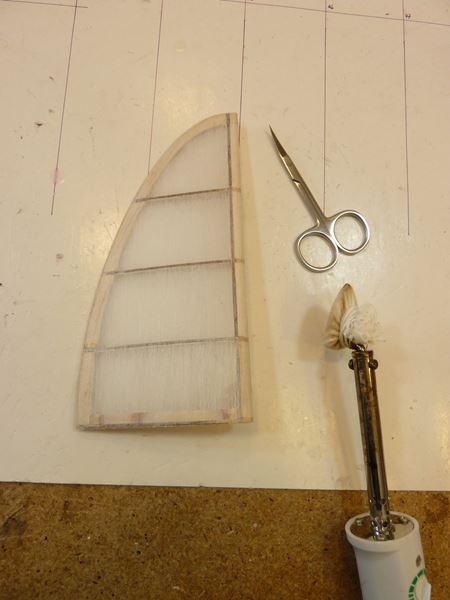
Ok, I knew it before but did not take care of:
the varnish/dope (Spannlack) is so strong, it's bending the last spare of the rudder ...
No chance to leave it like it is:
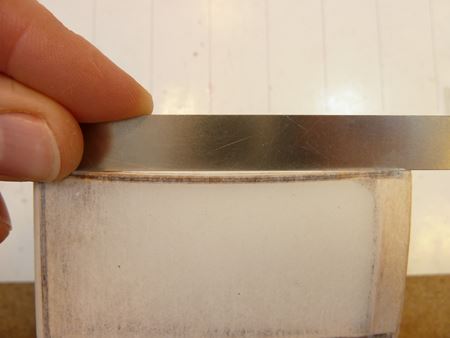
It needs more struts to enforce:
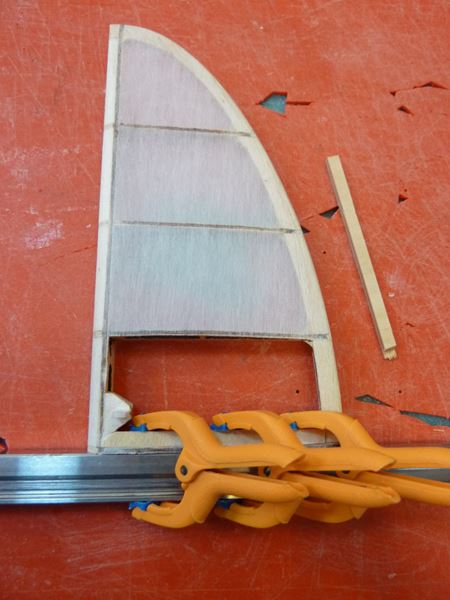
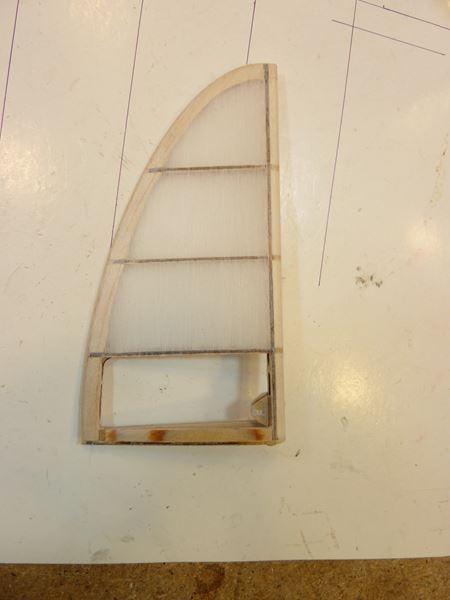
At least this correction is "invisible" and the spare is straight again
|
|
| Revenir en haut de page |
|
|
OliverPrinz
Apprenti Posteur
Inscrit le: 30 Mar 2010
Localisation: Baden-Württemberg
Âge: 58
|
| Posté le: 04/01/2015 23:31 Sujet du message: it's done |
|
|
|
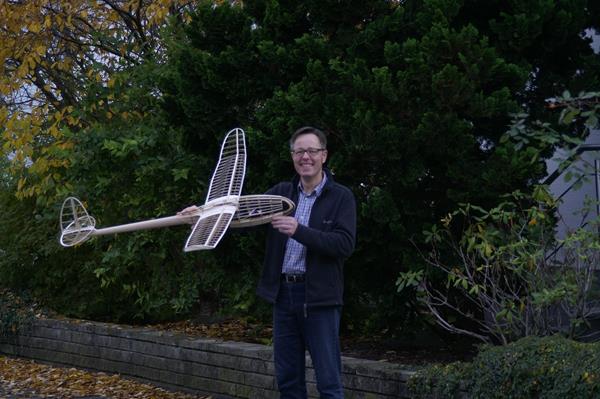
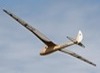
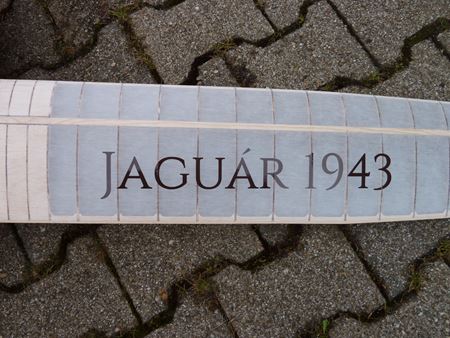
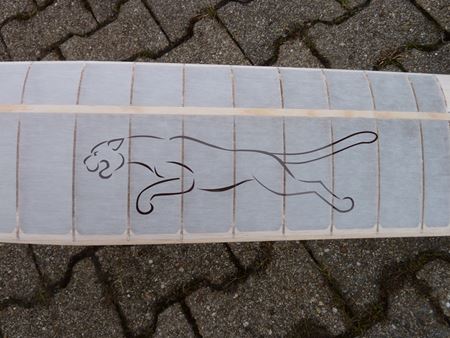
Today I've finalized the Jaguár with 705g lift-off weight
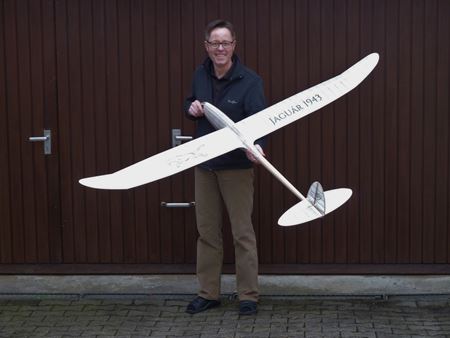
Here some more details:
Now I'm waiting for a good chance for the very first flight (with my knees shaking  ) ) |
|
| Revenir en haut de page |
|
|
Clifton
Psycho Posteur
Inscrit le: 07 Mai 2014
Localisation: Anjou
Âge: 61
|
| Posté le: 05/01/2015 00:16 Sujet du message: |
|
|
|
So nice, I love it !
Gool luck for the maiden flight and Happy new year.
Philippe
Slingsby Petrel, à mon gout le plus beau de tous, quoi que le Fafnir ... Ah ces ailes en mouette, un jour ....
Rien de ce qui est fini n'est jamais achevé tant que tout ce qui est commencé n'est pas totalement terminé (Pierre Dac) |
|
| Revenir en haut de page |
|
|
|