| Voir le sujet précédent :: Voir le sujet suivant |
| Auteur |
Message |
Johannes
Serial Posteur


Inscrit le: 23 Juil 2007

Localisation: Leichlingen
Âge: 66

|
 Posté le: 06/02/2020 16:12 Sujet du message: Posté le: 06/02/2020 16:12 Sujet du message: |
  |
|
|
Hi Vincent,
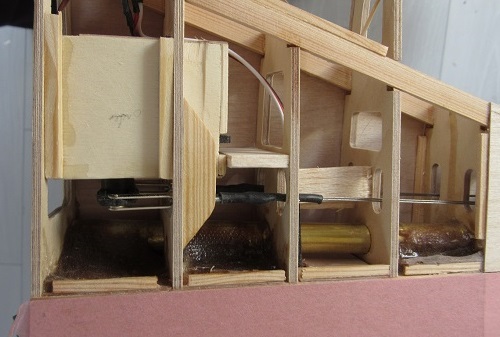
der Rumpf ist sehr schön und sauber gebaut - respekt ![[clap]](images/smiles/Clap.gif)
Besonders gefällt mir das Foto vom Rumpfinneren zum Heck
![[good]](images/smiles/good.gif)
LG Johannes


|
|
| Revenir en haut de page |
|
 |
Franco Vallari
Apprenti Posteur


Inscrit le: 22 Aoû 2017

Localisation: Italia
Âge: 66

|
 Posté le: 06/02/2020 20:45 Sujet du message: Posté le: 06/02/2020 20:45 Sujet du message: |
  |
|
|
Gran bel lavoro Vincent... ![[clap]](images/smiles/Clap.gif) ![[clap]](images/smiles/Clap.gif) ![[clap]](images/smiles/Clap.gif) |
|
| Revenir en haut de page |
|
 |
bocorvin
Maniaco Posteur


Inscrit le: 17 Aoû 2015

Localisation: Hillegom
Âge: 79

|
 Posté le: 06/02/2020 21:44 Sujet du message: Posté le: 06/02/2020 21:44 Sujet du message: |
  |
|
|
Merci Serge, danke Johannes et grazie Franco
The Gull is not modelled often, but its a nice glider 
Vincent |
|
| Revenir en haut de page |
|
 |
de Schaetzen Harold
Maniaco Posteur

Inscrit le: 06 Avr 2006

Localisation: Schilde
Âge: 79

|
 Posté le: 07/02/2020 11:34 Sujet du message: Posté le: 07/02/2020 11:34 Sujet du message: |
  |
|
|
Belle forme. Très élégant.
J'aime beaucoup.
Harold |
|
| Revenir en haut de page |
|
 |
bocorvin
Maniaco Posteur


Inscrit le: 17 Aoû 2015

Localisation: Hillegom
Âge: 79

|
 Posté le: 13/02/2020 12:26 Sujet du message: Posté le: 13/02/2020 12:26 Sujet du message: |
  |
|
|
Hello everyone,
Thanks for your remarks Harold, I agree with you, the "gull wing" gives it indeed an elegant look. I found another nice picture of the real thing 
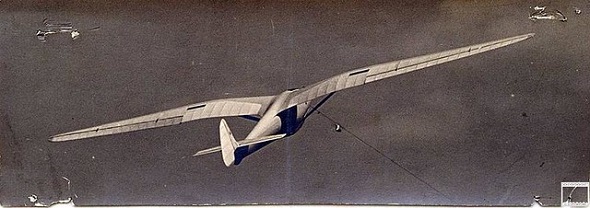
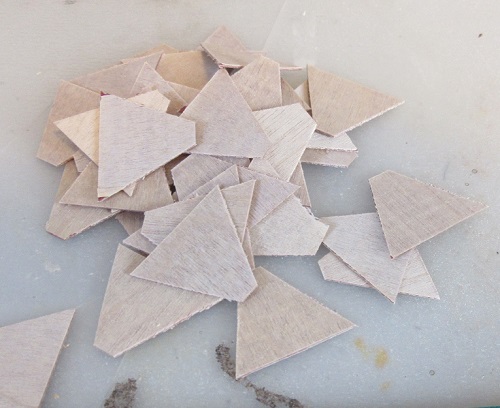
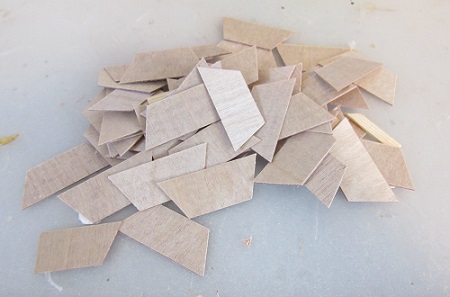
I went on with the wings, the capstrips and gusset plates had to be put on, a lot again!
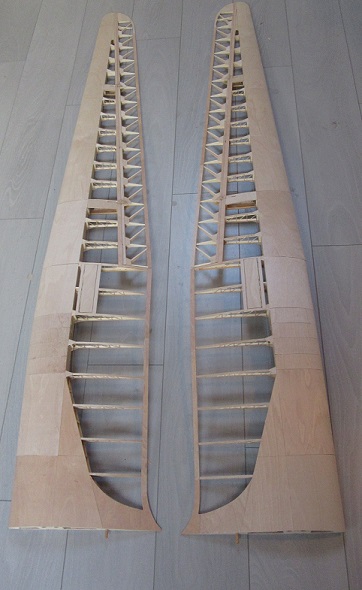
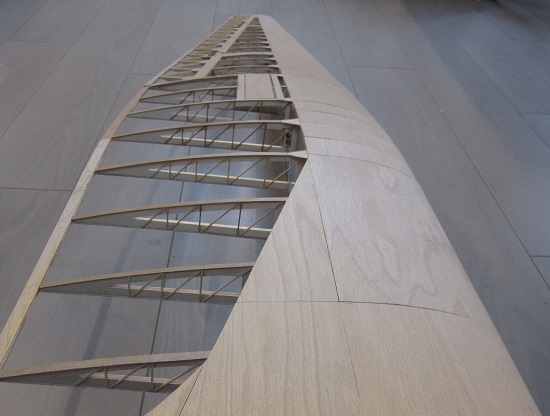
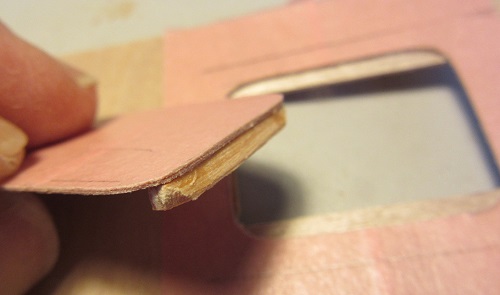
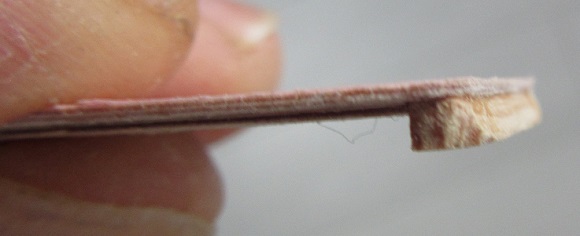
To keep the ailerons demountable, I had to keep the kwiklinks (or is it quicklinks  ) accessible, a hatch was needed. ) accessible, a hatch was needed.
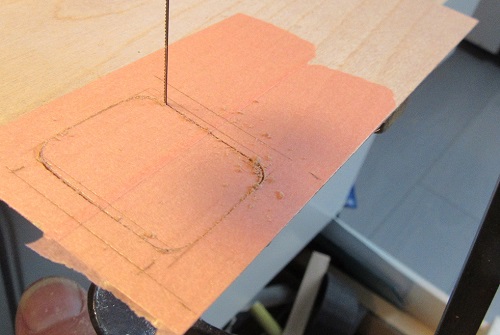
I used a metal piercing saw with tape against splintering
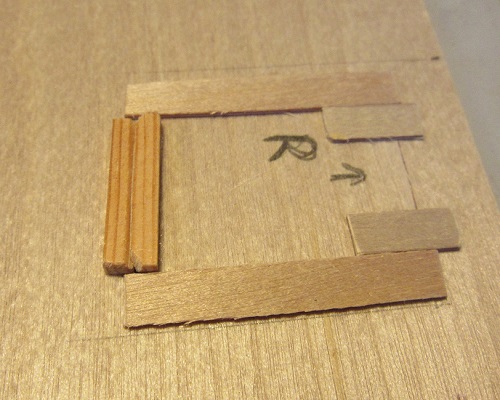
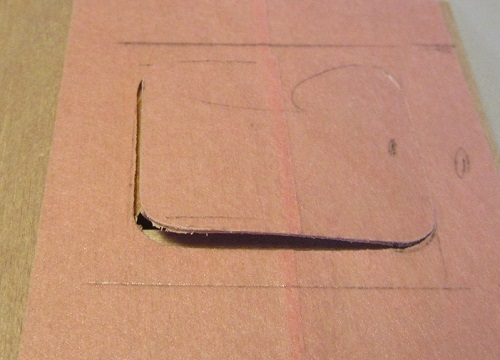
By bending the 0.6mm ply and a bevel? at one side it locks. Its possible to bend it through a hole in the root rib.
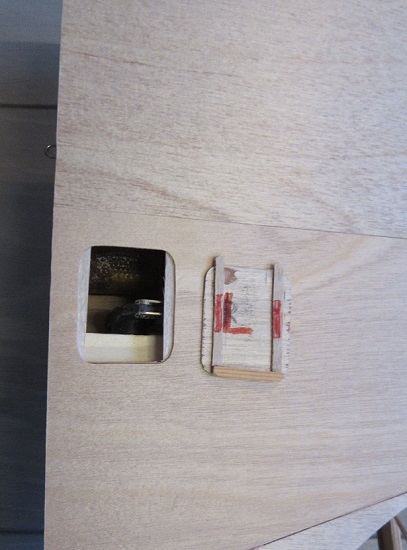
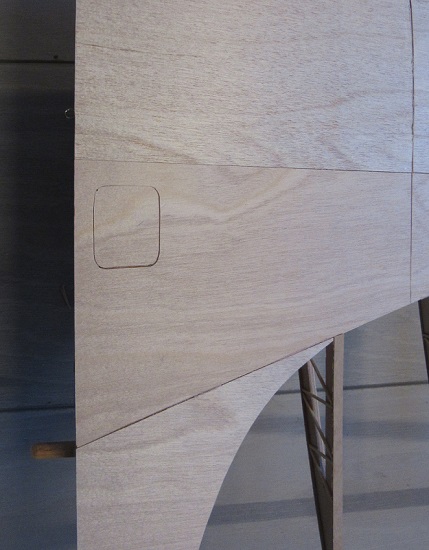
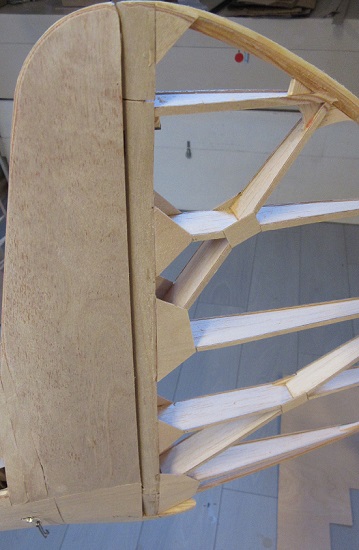
I didn't like the gusset plates at the elevator, I glued them on top of the D box as it should be, but I couldn't get the bevelling properly, it was distracting also.
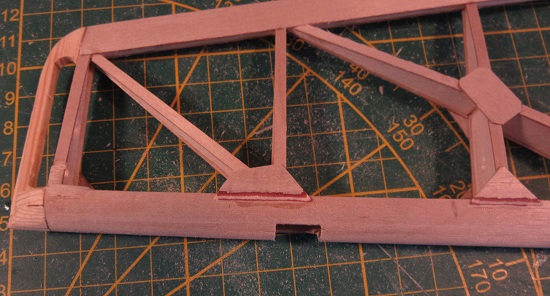
So I decided to make them flush.
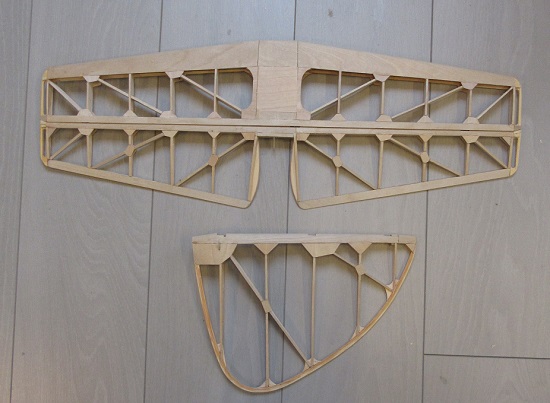
After this two day effort of cutting and gluing I made the hinges for the canopy, Folded a strip of nickel silver (big pliers  ) )
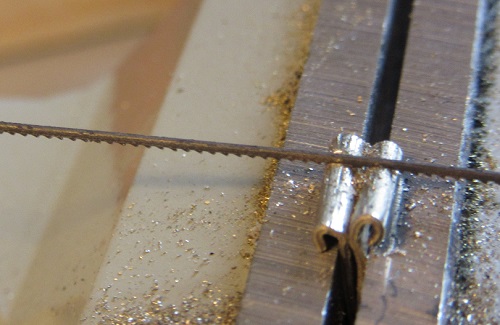
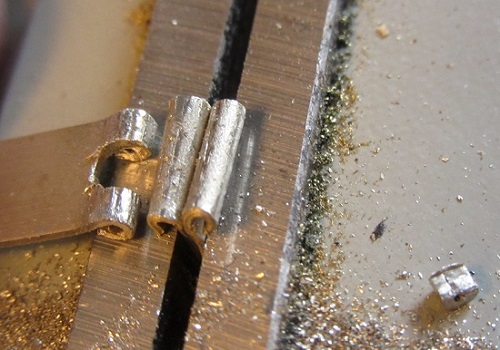
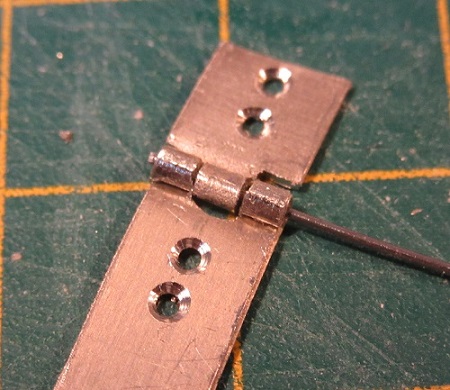
and fitted the canopy (still demountable, the hinge pins are temporary)
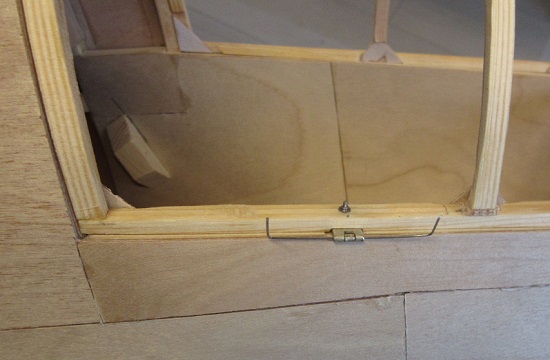
The canopy looks to small, it gets wooden battens at the outside after fitting the glass.
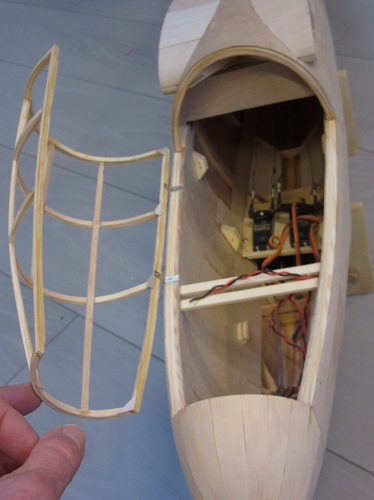
To be continued,
Vincent. |
|
| Revenir en haut de page |
|
 |
sebastian92
Serial Posteur


Inscrit le: 01 Sep 2015

Localisation: Hauts de seine
Âge: 62

|
 Posté le: 13/02/2020 12:46 Sujet du message: Posté le: 13/02/2020 12:46 Sujet du message: |
  |
|
|
hello Vincent,
all these little details are very long… but it gives the final look of our models !
it's a good sign ; you're going well towards the end 
The storm is strong ; we stay warm in our house and workshops 

Pourvu que ça vole, roule, flotte ! normalement j'ai tout bien fait pour…
Un bel avion est un avion qui vole bien ! Marcel Dassault
…………
Sebastian
••••••••••••••••••••
Vends module émission 2.4 ghz pour Futaba, Hitec TZ-FM + 2 récepteurs corona 8 voies (contact en MP)
•••••••••••••••••••• |
|
| Revenir en haut de page |
|
 |
Clifton
Psycho Posteur


Inscrit le: 06 Mai 2014

Localisation: Anjou
Âge: 62

|
 Posté le: 13/02/2020 19:02 Sujet du message: Posté le: 13/02/2020 19:02 Sujet du message: |
  |
|
|
So marvellous and great job as usuall !

Slingsby Petrel, à mon gout le plus beau de tous, quoi que le Fafnir ... Ah ces ailes en mouette, un jour ....
Rien de ce qui est fini n'est jamais achevé tant que tout ce qui est commencé n'est pas totalement terminé (Pierre Dac) |
|
| Revenir en haut de page |
|
 |
bocorvin
Maniaco Posteur


Inscrit le: 17 Aoû 2015

Localisation: Hillegom
Âge: 79

|
 Posté le: 14/02/2020 17:12 Sujet du message: Posté le: 14/02/2020 17:12 Sujet du message: |
  |
|
|
Thank you Sebastian and Philippe for your nice feedback 
Its also dreadfull weather over here, one gale after the other  . .
When the weather is better I hope to make some photo's outside to give a good impression how the Gull looks at this stage.
Vincent. |
|
| Revenir en haut de page |
|
 |
Peter64
Maniaco Posteur


Inscrit le: 17 Oct 2007

Localisation: Kärnten
Âge: 61

|
 Posté le: 15/02/2020 14:16 Sujet du message: Posté le: 15/02/2020 14:16 Sujet du message: |
  |
|
|
Congratulations ![[clap]](images/smiles/Clap.gif) ![[clap]](images/smiles/Clap.gif) ![[good]](images/smiles/good.gif)
Greetings
Peter |
|
| Revenir en haut de page |
|
 |
bocorvin
Maniaco Posteur


Inscrit le: 17 Aoû 2015

Localisation: Hillegom
Âge: 79

|
 Posté le: 19/02/2020 20:16 Sujet du message: Posté le: 19/02/2020 20:16 Sujet du message: |
  |
|
|
Hello everyone,
Thanks Peter for your nice words  . .
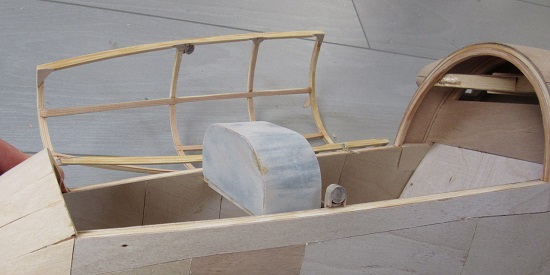
I had some problems to solve int he cockpit. It was hard to get the info, here in the museum in Edenburgh, the Gull hanging at the ceiling and dufficult to get by!
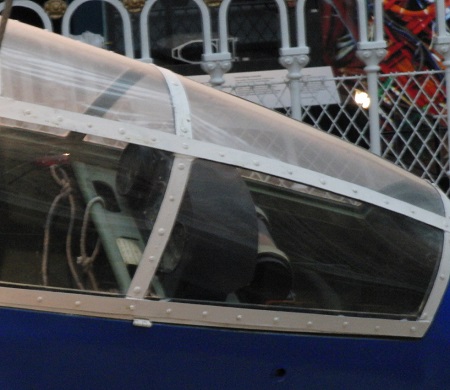
There is a kind of platform under the instrument panel
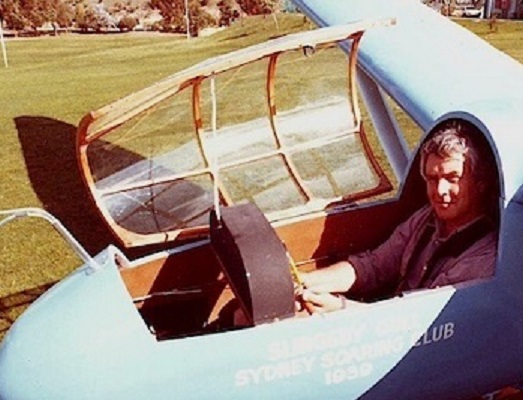
I also wanted to have my receiverpack and switch in it.
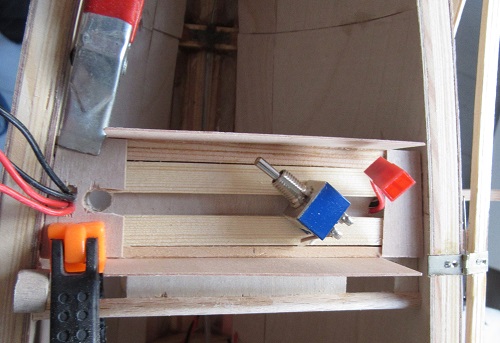
It was not easy to fit all in it, I had to remake it a couple of times
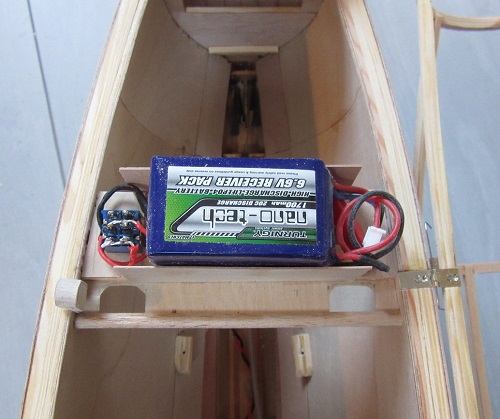
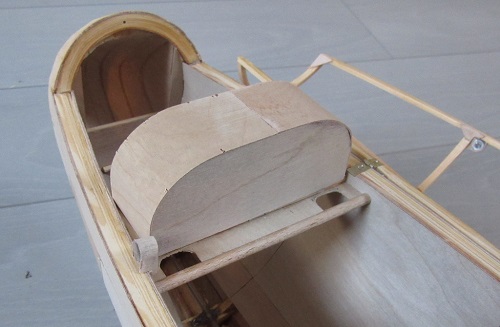
The instrument panel itself will be black, the ply I used chipped quite easily, luckily it will be painted.
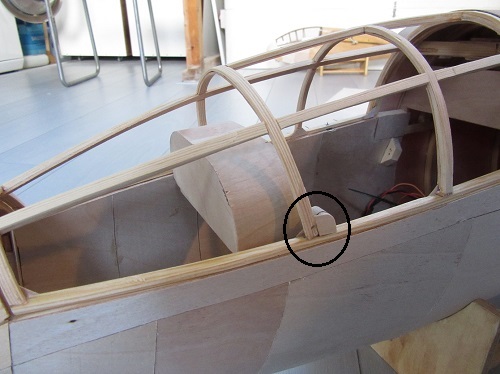
In the circle is a strong magnet lock (covered with ply) to hold the canopy shut..
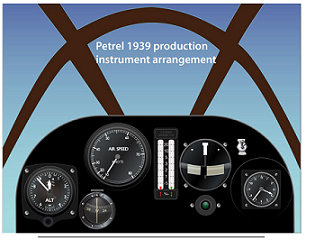
On the Scale soaring UK site I found this picture of the Petrel intstrument panel, which looks identical to that of the Gull in my view.
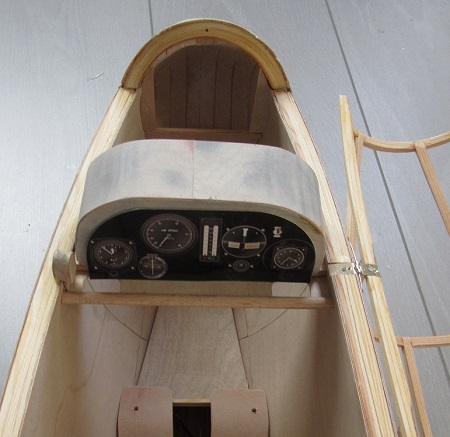
I ordered the instruments at Aerocockpit, maybe I use the dials from this picture.
to be continued,
Vincent |
|
| Revenir en haut de page |
|
 |
patte de loup
Incurable Posteur


Inscrit le: 25 Jan 2006

Localisation: Alsace (Strasbourg)
Âge: 67

|
 Posté le: 19/02/2020 21:05 Sujet du message: Posté le: 19/02/2020 21:05 Sujet du message: |
  |
|
|
Vince,
Maybe , you could contact Vince Cocket through SSUK to catch up some further information? This guy is very kind
A+
Pat'

Un "prédateur" des pentes de France et de Navarre |
|
| Revenir en haut de page |
|
 |
bocorvin
Maniaco Posteur


Inscrit le: 17 Aoû 2015

Localisation: Hillegom
Âge: 79

|
 Posté le: 19/02/2020 22:23 Sujet du message: Posté le: 19/02/2020 22:23 Sujet du message: |
  |
|
|
Hello Pat,
That sounds good, I'll try to contact him, I guess via SSUK.
Thanks a lot for that idea 
Kind regards,
Vincent |
|
| Revenir en haut de page |
|
 |
bocorvin
Maniaco Posteur


Inscrit le: 17 Aoû 2015

Localisation: Hillegom
Âge: 79

|
 Posté le: 08/03/2020 14:59 Sujet du message: Posté le: 08/03/2020 14:59 Sujet du message: |
  |
|
|
Hello everyone,
Thanks to Pat', I contacted Vince Cocket and he send me the layout of the instrument panel of the Gull T.12 and T.15
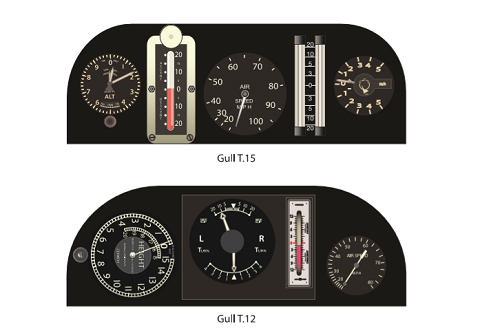
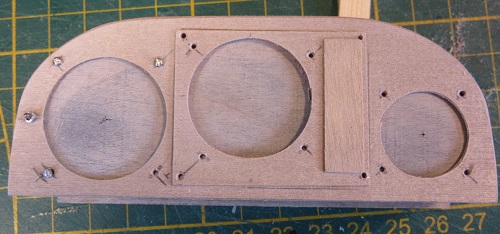
Because I modelled the T.12 (the one with struts) I choosed the lower image. Nice detail; the altimeter is turned 90 degr  . There seems hardly any bezels to be, so I tried to make it more or less flush . There seems hardly any bezels to be, so I tried to make it more or less flush
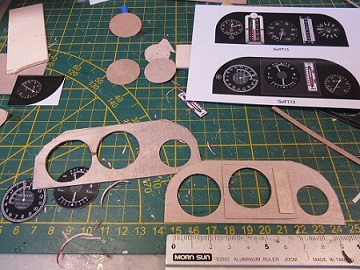
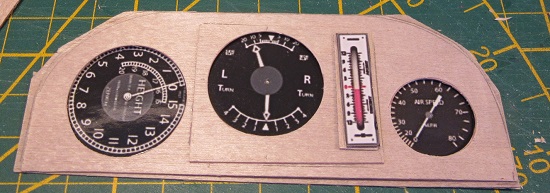
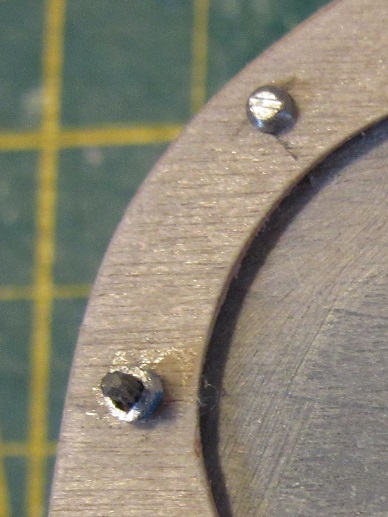
I thought there most have been machine screws to fasten the instruments and I didn't have them that small, so I modified some pins
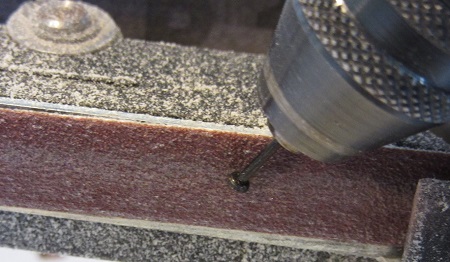
first sanded the head and then I made a small sawcut
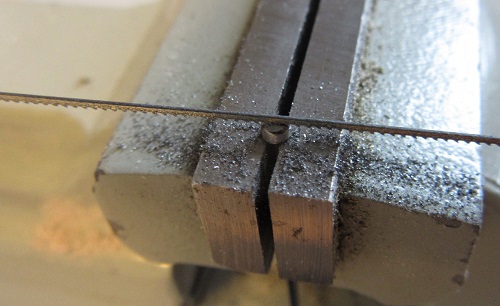
Now it gives (hopefully) the impression of screw heads
After its sprayed black the dials with glazing can slide in from the bottom
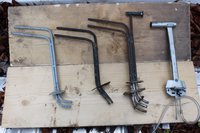
Another detail is the pitot tube, on the Scale Soaring UK site I found a nice picture of a number of pitot tubes
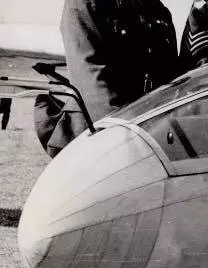
combined with a photo of the Gull
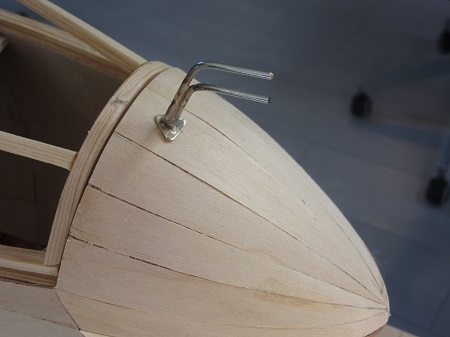
I made this from solid metal bar, silver soldered is a square braas tube.
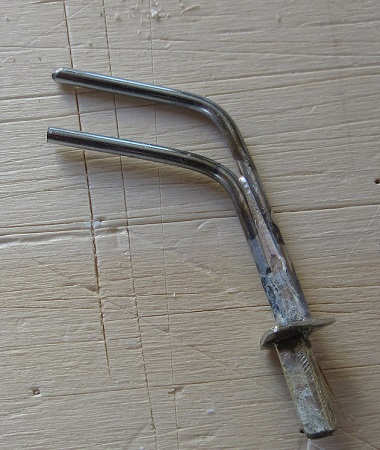
Because its is vulnerable in transport I made it detachable, sliding in a bigger square brass tube in the nose and secured with a small magnet
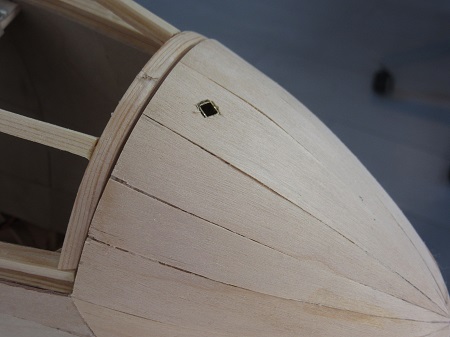
Talking about vulnerability, I discovered (you can see the repair...) that the wing root TE was also a weak spot
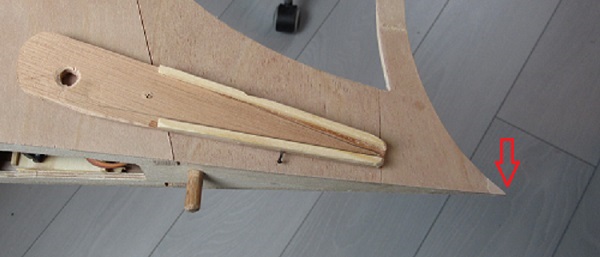
and I made a rather crude protecting device
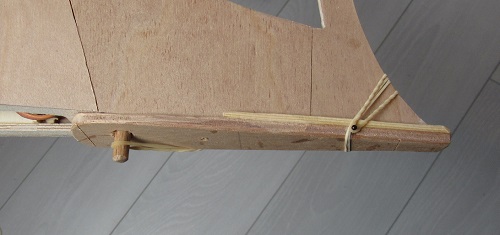
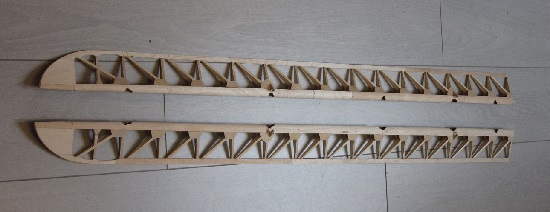
All the capstrips on the ailerons were fitted and I also made a washout of 4mm at the tip of the ailerons
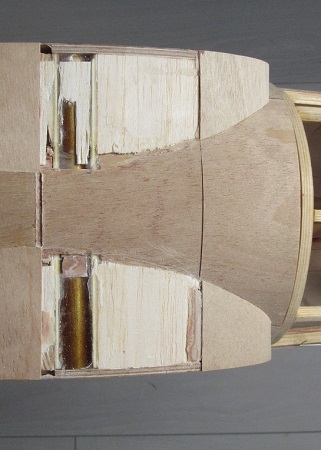
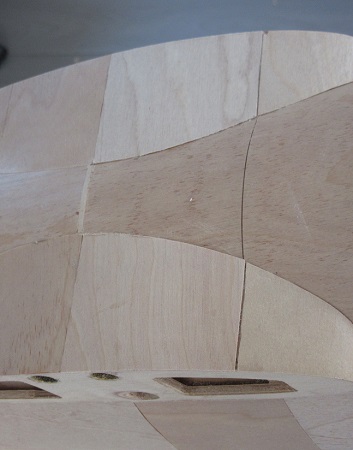
I replaced two panels with some chipping
and finally I sculped the pilots head, again helped enormously by the tutorial of Josh Foreman
https://www.youtube.com/watch?v=WlPYWe2bGUo
Material I use (thats Vincent Becancon idea) is Super Sculpey Living Doll, a kind of polymere clay that can be baked in a oven at 140 degr for about 30mins (instructions are on the package)
The head is basically made on a wooden stick with a clump of aluminium foil to get a reasonably thickness (les than about 10mm)of the material. After baking I pulled the stick out and milled the head further out, to reduce the weight, its now 89 grams.
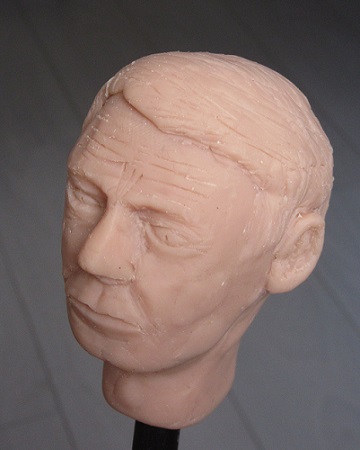
My sister is making its clothes and cap, so I am curious how he will look!
To be continued, Vincent.
|
|
| Revenir en haut de page |
|
 |
bocorvin
Maniaco Posteur


Inscrit le: 17 Aoû 2015

Localisation: Hillegom
Âge: 79

|
 Posté le: 08/03/2020 18:14 Sujet du message: Posté le: 08/03/2020 18:14 Sujet du message: |
  |
|
|
| To be continued, Vincent. |
|
| Revenir en haut de page |
|
 |
patte de loup
Incurable Posteur


Inscrit le: 25 Jan 2006

Localisation: Alsace (Strasbourg)
Âge: 67

|
 Posté le: 09/03/2020 06:19 Sujet du message: Posté le: 09/03/2020 06:19 Sujet du message: |
  |
|
|
Pretty things ![[clap]](images/smiles/Clap.gif) ![[clap]](images/smiles/Clap.gif) ![[clap]](images/smiles/Clap.gif)
Pat'

Un "prédateur" des pentes de France et de Navarre |
|
| Revenir en haut de page |
|
 |
caralp_laurent
Psycho Posteur


Inscrit le: 30 Jan 2006

Localisation: La Houssaye en Brie 77
Âge: 53

|
 Posté le: 09/03/2020 10:39 Sujet du message: Posté le: 09/03/2020 10:39 Sujet du message: |
  |
|
|
Hi Vincent,
Bravo, it's superb !
Will you come to launch it at Chantemerle this summer ? 
Friendly,
Lolo

Lolométéo, rétro addict ;o)
"On commence à vieillir quand on remplace ses rêves par des regrets"
Sénèque |
|
| Revenir en haut de page |
|
 |
bocorvin
Maniaco Posteur


Inscrit le: 17 Aoû 2015

Localisation: Hillegom
Âge: 79

|
 Posté le: 09/03/2020 11:29 Sujet du message: Posté le: 09/03/2020 11:29 Sujet du message: |
  |
|
|
Thanks Pat' and Lolo for your nice words  . I often see only the things wich went wrong . I often see only the things wich went wrong 
Lolo, its not possible for me to come to Chantemerle, I wish you good weather, nice winds and a lot of thermals  
Amicalement, Vincent |
|
| Revenir en haut de page |
|
 |
caralp_laurent
Psycho Posteur


Inscrit le: 30 Jan 2006

Localisation: La Houssaye en Brie 77
Âge: 53

|
 Posté le: 09/03/2020 22:43 Sujet du message: Posté le: 09/03/2020 22:43 Sujet du message: |
  |
|
|
Thanks Vincent 
I wish you good flights too 
Friendly,
Lolo

Lolométéo, rétro addict ;o)
"On commence à vieillir quand on remplace ses rêves par des regrets"
Sénèque |
|
| Revenir en haut de page |
|
 |
bocorvin
Maniaco Posteur


Inscrit le: 17 Aoû 2015

Localisation: Hillegom
Âge: 79

|
 Posté le: 14/03/2020 13:52 Sujet du message: Posté le: 14/03/2020 13:52 Sujet du message: |
  |
|
|
Hello everyone,
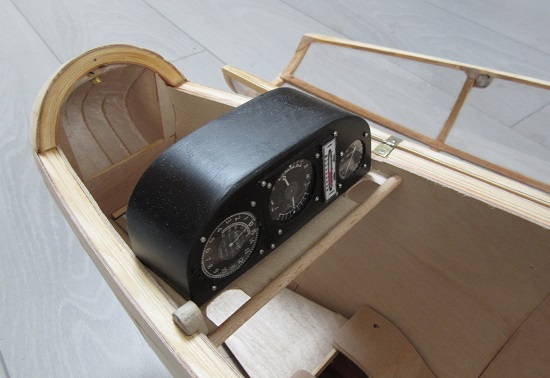
I sprayed the instrument panel satin black
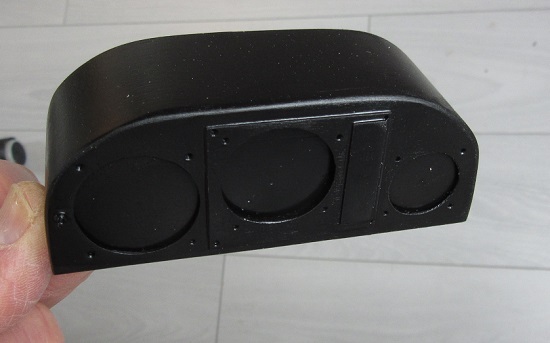
very black...
I didn't glue the ply at the bottom, so I could slid the cut out dials in. On top of the dials I put a disc from about 0.3mm clear plastic sheet as glazing. Finally I glued the "screws" in place.
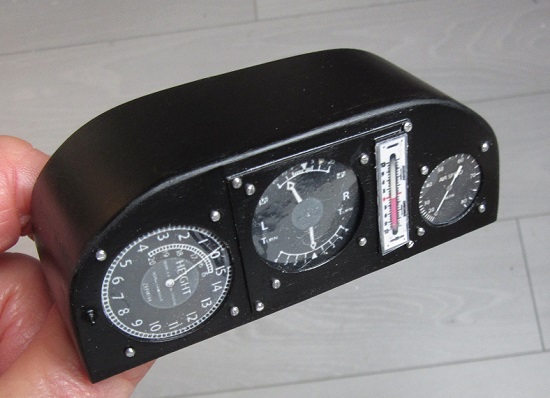
Next the glazing of the canopy. The real Gull has wooden strips also on the outside.

I started with staining the frame of the canopy. I choose to do that with bister (an organic material I bought in artist shop). I cut the canopy glazing in three parts which I glued on the frame with 'canopy glue'. After drying I glued strips (0.5 X 5mm spruce) lenghtwise
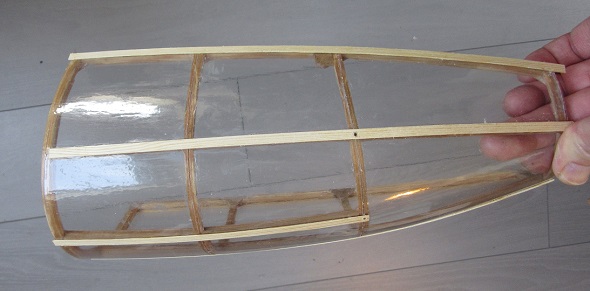
not easy, its slippery  . I cut slots in these strips and glued brebent strips across . I cut slots in these strips and glued brebent strips across
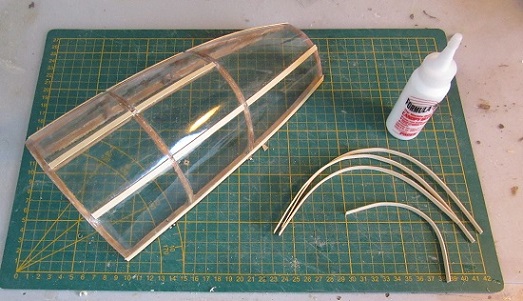
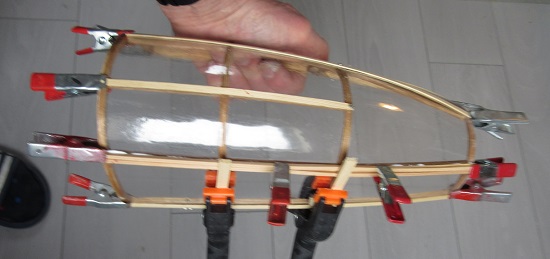
excuse that the picture is blurred but it was the only shot of the gluiing, short of hands...
After a lot of fiddling it fitted reasonably flush with the rest of the fuselage.
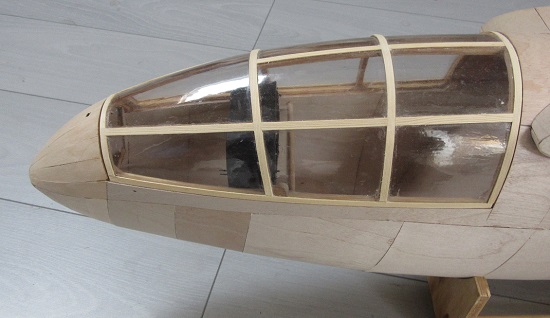
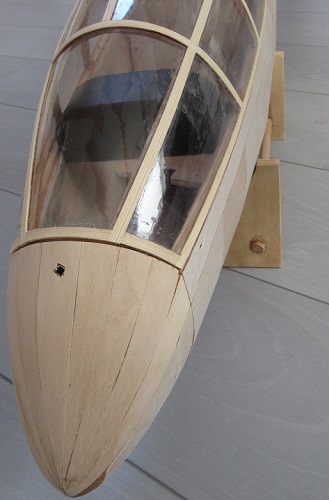
the instrument panel in its place
The fuselage still needed its skid, I decided to make a rigid one.
Laminated 3 layers of 4mm balsa, painted dirty black and the skid itself from 2 layers of 3mm spruce
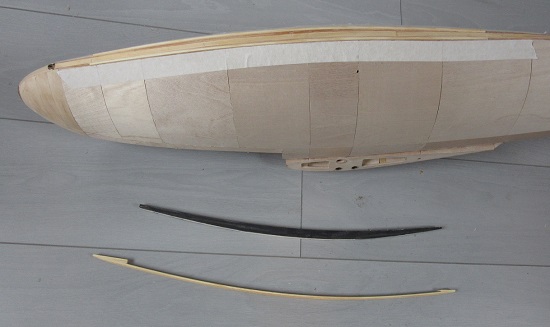
two small battens to keep "the canvas" in its place are already glued on the bottom of the fuselage.
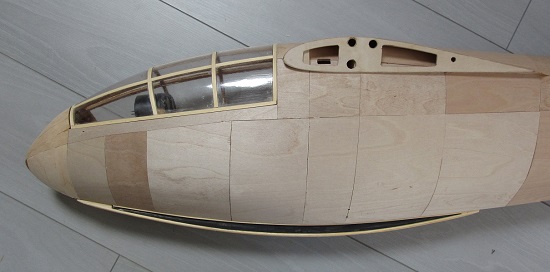
To be continued,
Vincent. |
|
| Revenir en haut de page |
|
 |
bocorvin
Maniaco Posteur


Inscrit le: 17 Aoû 2015

Localisation: Hillegom
Âge: 79

|
 Posté le: 21/03/2020 16:03 Sujet du message: Posté le: 21/03/2020 16:03 Sujet du message: |
  |
|
|
Bonjour a tous,
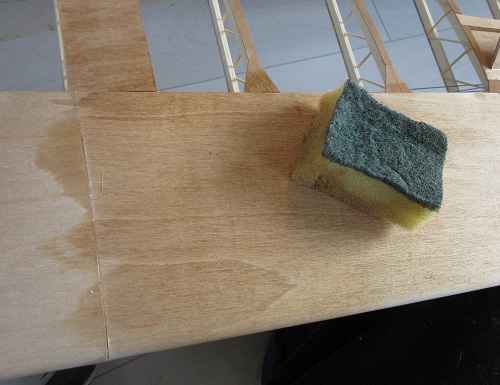
It was time to finish the ply. I hesitated which colour I would choose. In the end I decided to make a fairly light staining, making the Gull how it should have looked leaving the factory.
So I used bister, (Francais; bistre) the same stuff as on my Nemere 1/6. It is an organic pigment (a powder) with only water added. Rembrandt used it, I bought it in an artist shop. I diluted it quite a lot, till I got the right staining ( I hope....)
I put it on with a brush and
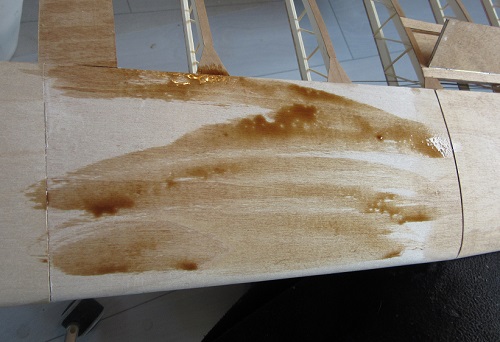
because its practically only water it had to be spread with a sponge
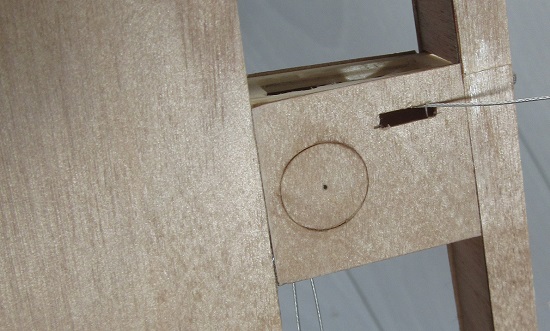
A small detail; I made the impression of inspection hatches with a rotating cutter, just in the outer layer of the ply (after glueing 3mm balsa behind the ply), stained it so the scraped circle became very visible
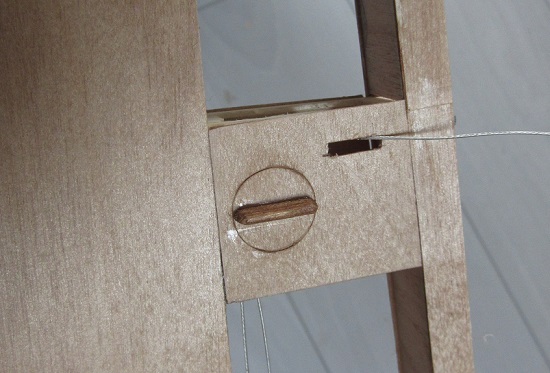
and than glued the "handle" on the hatch
I put on two layers of "porienfuller" (did this job outside) and after some sanding one layer PU boatvarnish
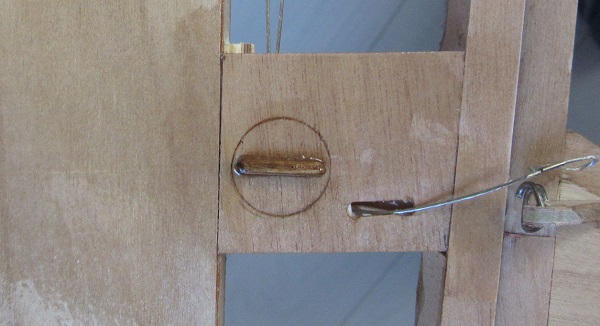
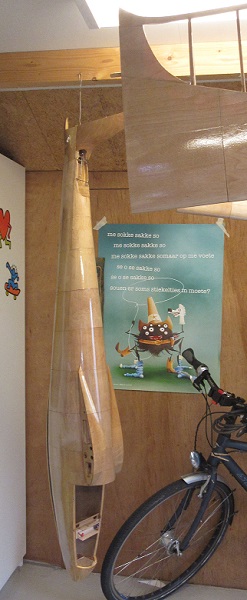
Put it together
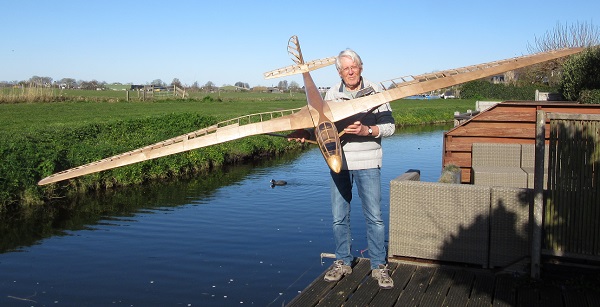
I had the sun straight in my face...
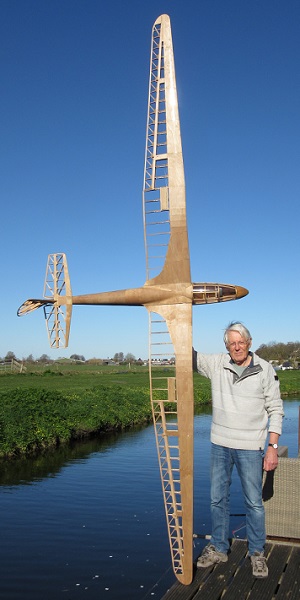
Ready to put the diacov on, which I received last week.
Vincent
|
|
| Revenir en haut de page |
|
 |
sebastian92
Serial Posteur


Inscrit le: 01 Sep 2015

Localisation: Hauts de seine
Âge: 62

|
 Posté le: 21/03/2020 17:26 Sujet du message: Posté le: 21/03/2020 17:26 Sujet du message: |
  |
|
|
Hello Vincent,
beautiful color and beautiful reflections on the wood !
do you live near the river ? it is splendid at this season !
many thanks for this picture ; a very pleasant breath of fresh air 

Pourvu que ça vole, roule, flotte ! normalement j'ai tout bien fait pour…
Un bel avion est un avion qui vole bien ! Marcel Dassault
…………
Sebastian
••••••••••••••••••••
Vends module émission 2.4 ghz pour Futaba, Hitec TZ-FM + 2 récepteurs corona 8 voies (contact en MP)
•••••••••••••••••••• |
|
| Revenir en haut de page |
|
 |
Franco Vallari
Apprenti Posteur


Inscrit le: 22 Aoû 2017

Localisation: Italia
Âge: 66

|
 Posté le: 21/03/2020 17:39 Sujet du message: Posté le: 21/03/2020 17:39 Sujet du message: |
  |
|
|
Molto bello Vincent.....complimenti ![[clap]](images/smiles/Clap.gif) ![[clap]](images/smiles/Clap.gif) ![[clap]](images/smiles/Clap.gif) |
|
| Revenir en haut de page |
|
 |
Claude Moinier
Apprenti Posteur


Inscrit le: 29 Mai 2009

Localisation: Pays-Bas
Âge: 74

|
 Posté le: 21/03/2020 18:13 Sujet du message: Posté le: 21/03/2020 18:13 Sujet du message: |
  |
|
|
An eyecatcher Vincent, bravo ![[clap]](images/smiles/Clap.gif) ![[clap]](images/smiles/Clap.gif)

I Fly without Engine
ClaudeM |
|
| Revenir en haut de page |
|
 |
bocorvin
Maniaco Posteur


Inscrit le: 17 Aoû 2015

Localisation: Hillegom
Âge: 79

|
 Posté le: 21/03/2020 19:38 Sujet du message: Posté le: 21/03/2020 19:38 Sujet du message: |
  |
|
|
Merci beaucoup Sebastian, grazie Franco et merci beaucoup Claude for the nice comments  
The water is not a river, its a made by digging, a ditch I presume
A big part of The Netherlands is actually below the NAP (sea level). Our house is about 1meter below sea level and just 100meters away from us, is the Haarlemmermeerpolder which is 4meters below sea level. Good fun to check that on Wikipedia!
Vincent |
|
| Revenir en haut de page |
|
 |
ManfredNeu
Accro Posteur


Inscrit le: 02 Jan 2009

Localisation: HalleWestfalen
Âge: 76

|
 Posté le: 22/03/2020 13:10 Sujet du message: Posté le: 22/03/2020 13:10 Sujet du message: |
  |
|
|
einfach nur wunderschön ![[amen]](images/smiles/amen.gif) ![[clap]](images/smiles/Clap.gif) , Vincent. , Vincent.
Manfred |
|
| Revenir en haut de page |
|
 |
caralp_laurent
Psycho Posteur


Inscrit le: 30 Jan 2006

Localisation: La Houssaye en Brie 77
Âge: 53

|
 Posté le: 22/03/2020 19:22 Sujet du message: Posté le: 22/03/2020 19:22 Sujet du message: |
  |
|
|
Hi Vincent !
Wow, it's magnificent ! Congratulations ! ![[amen]](images/smiles/amen.gif) ![[amen]](images/smiles/amen.gif) ![[amen]](images/smiles/amen.gif)
Lolo

Lolométéo, rétro addict ;o)
"On commence à vieillir quand on remplace ses rêves par des regrets"
Sénèque |
|
| Revenir en haut de page |
|
 |
hermann
Maniaco Posteur


Inscrit le: 25 Mai 2006

Localisation: Région Parisienne
|
 Posté le: 23/03/2020 12:47 Sujet du message: Posté le: 23/03/2020 12:47 Sujet du message: |
  |
|
|
Hallo Vincent,
Herzlichen Glückwunsch ![[clap]](images/smiles/Clap.gif) ![[clap]](images/smiles/Clap.gif) , sehr schönes Projekt und Realisierung , sehr schönes Projekt und Realisierung ![[amen]](images/smiles/amen.gif) ![[amen]](images/smiles/amen.gif) . .
Ich hoffe wir treffen uns diesen Sommer. 
Sehr freundlich
Charles |
|
| Revenir en haut de page |
|
 |
bocorvin
Maniaco Posteur


Inscrit le: 17 Aoû 2015

Localisation: Hillegom
Âge: 79

|
 Posté le: 24/03/2020 11:50 Sujet du message: Posté le: 24/03/2020 11:50 Sujet du message: |
  |
|
|
Danke Manfred und Charles fur die angenehme Worte and thanks Lolo for your nice comments  
I start putting on the diacov, hopefully all stays straight and level...
Vincent (DB) |
|
| Revenir en haut de page |
|
 |
bocorvin
Maniaco Posteur


Inscrit le: 17 Aoû 2015

Localisation: Hillegom
Âge: 79

|
 Posté le: 13/04/2020 11:28 Sujet du message: Posté le: 13/04/2020 11:28 Sujet du message: |
  |
|
|
Bonjour a tous,
After the varnish I put on the Diacov
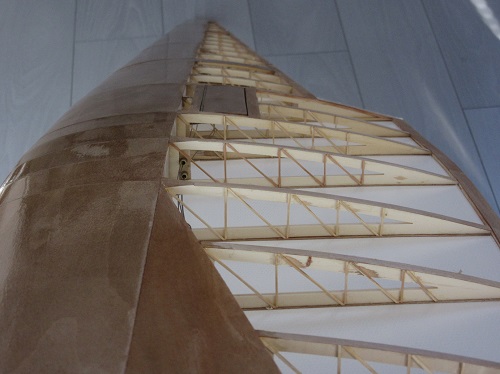
and put on a ply ring, just as a dummy inspection opening for the spoiler
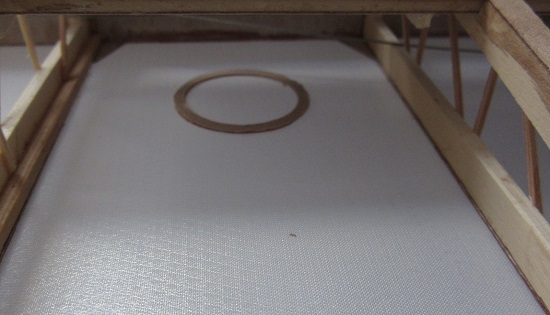
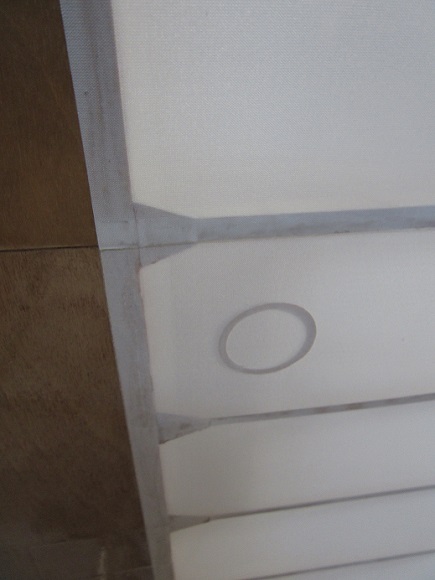
Then varnished the Diacov and had a bit mixed feelings about that, some less good varnishing at the bottom, not possible to change it 
Now I could put the CG alright and I had to put in more lead than I had hoped.
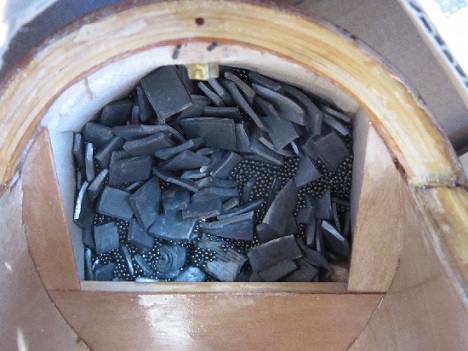
700 gr, making 950 gr lead in total. poured in 24h epoxy, so it became a rigid block.
Reason for so much weight was perhaps the weight of the tailplane (145gr). Total weight of the plane is 5200 gr with struts (2 X 10mm carbon wingjoiners) giving a wing load of about 55gr/dm2 and 5600 gr without struts (2 x 10mm steel wingjoiners) giving a wingload of about 59gr/dm2.
After fitting the receiver and programming the transmitter I discovered a nasty problem  , the ailerons didn't come well in their neutral position. , the ailerons didn't come well in their neutral position.
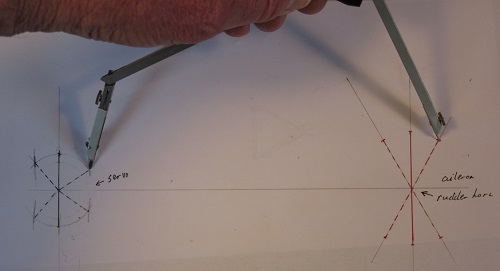
How did that come? To avoid problems with the steering cables I made the servo arm exactly as long as the rudderhorns. Because there was some friction in the pulleys and the servo arm was long , it didn't centre properly. What to do? I discussed it (at 1.5meter distance) with my friend Adri (from the anemometre on the Fokker) who had an identical problem already solved. He made a angled servo arm. I made a crude drawing and with a compass I constructed the angle on the servo arm, sorry, its analog  . In this drawing the servo arm is half of the aileron arm . In this drawing the servo arm is half of the aileron arm
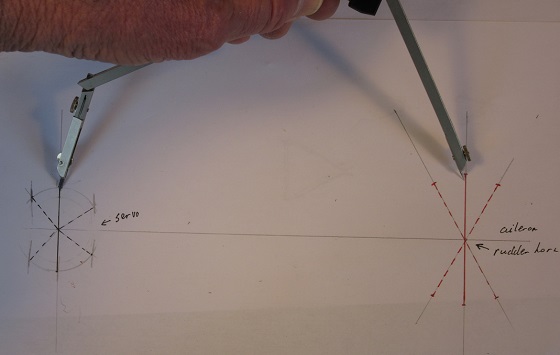
second drawing at 30 degr
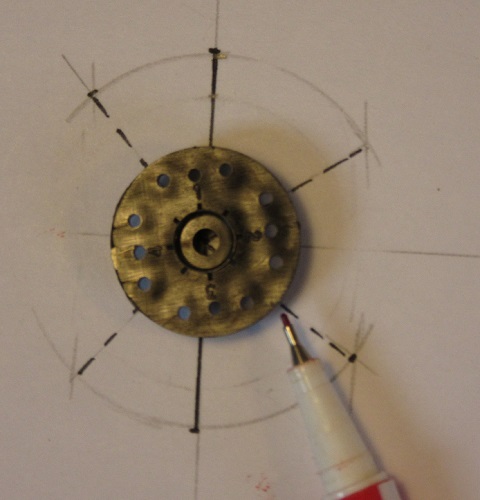
I converted this angle om a circular servo arm and had to drill an extra hole
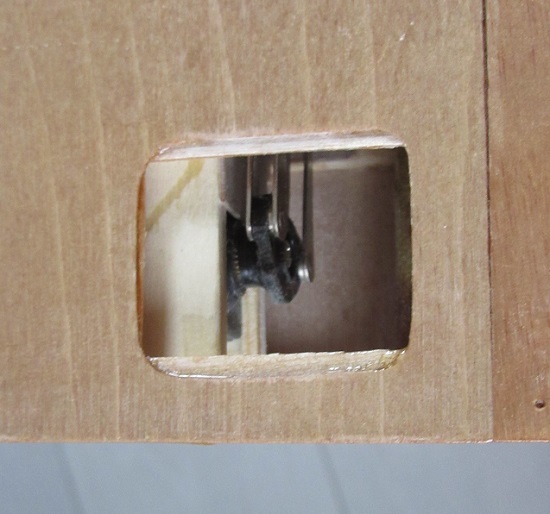
To my relief I had made an inspection opening in the bottom of the wing root, so I could change the servo arm and adjust the steering cables.
To my big relief the ailerons worked nicely and returned now to their neutral position 
To be continued,
Vincent (DB)
|
|
| Revenir en haut de page |
|
 |
Olli
Incurable Posteur


Inscrit le: 22 Juil 2006

Localisation: Germany
Âge: 57

|
|
| Revenir en haut de page |
|
 |
|

